
Analysis Report
Click the analysis report icon in the analyzer to enter the analysis report page.
Report Template
Create Report Template
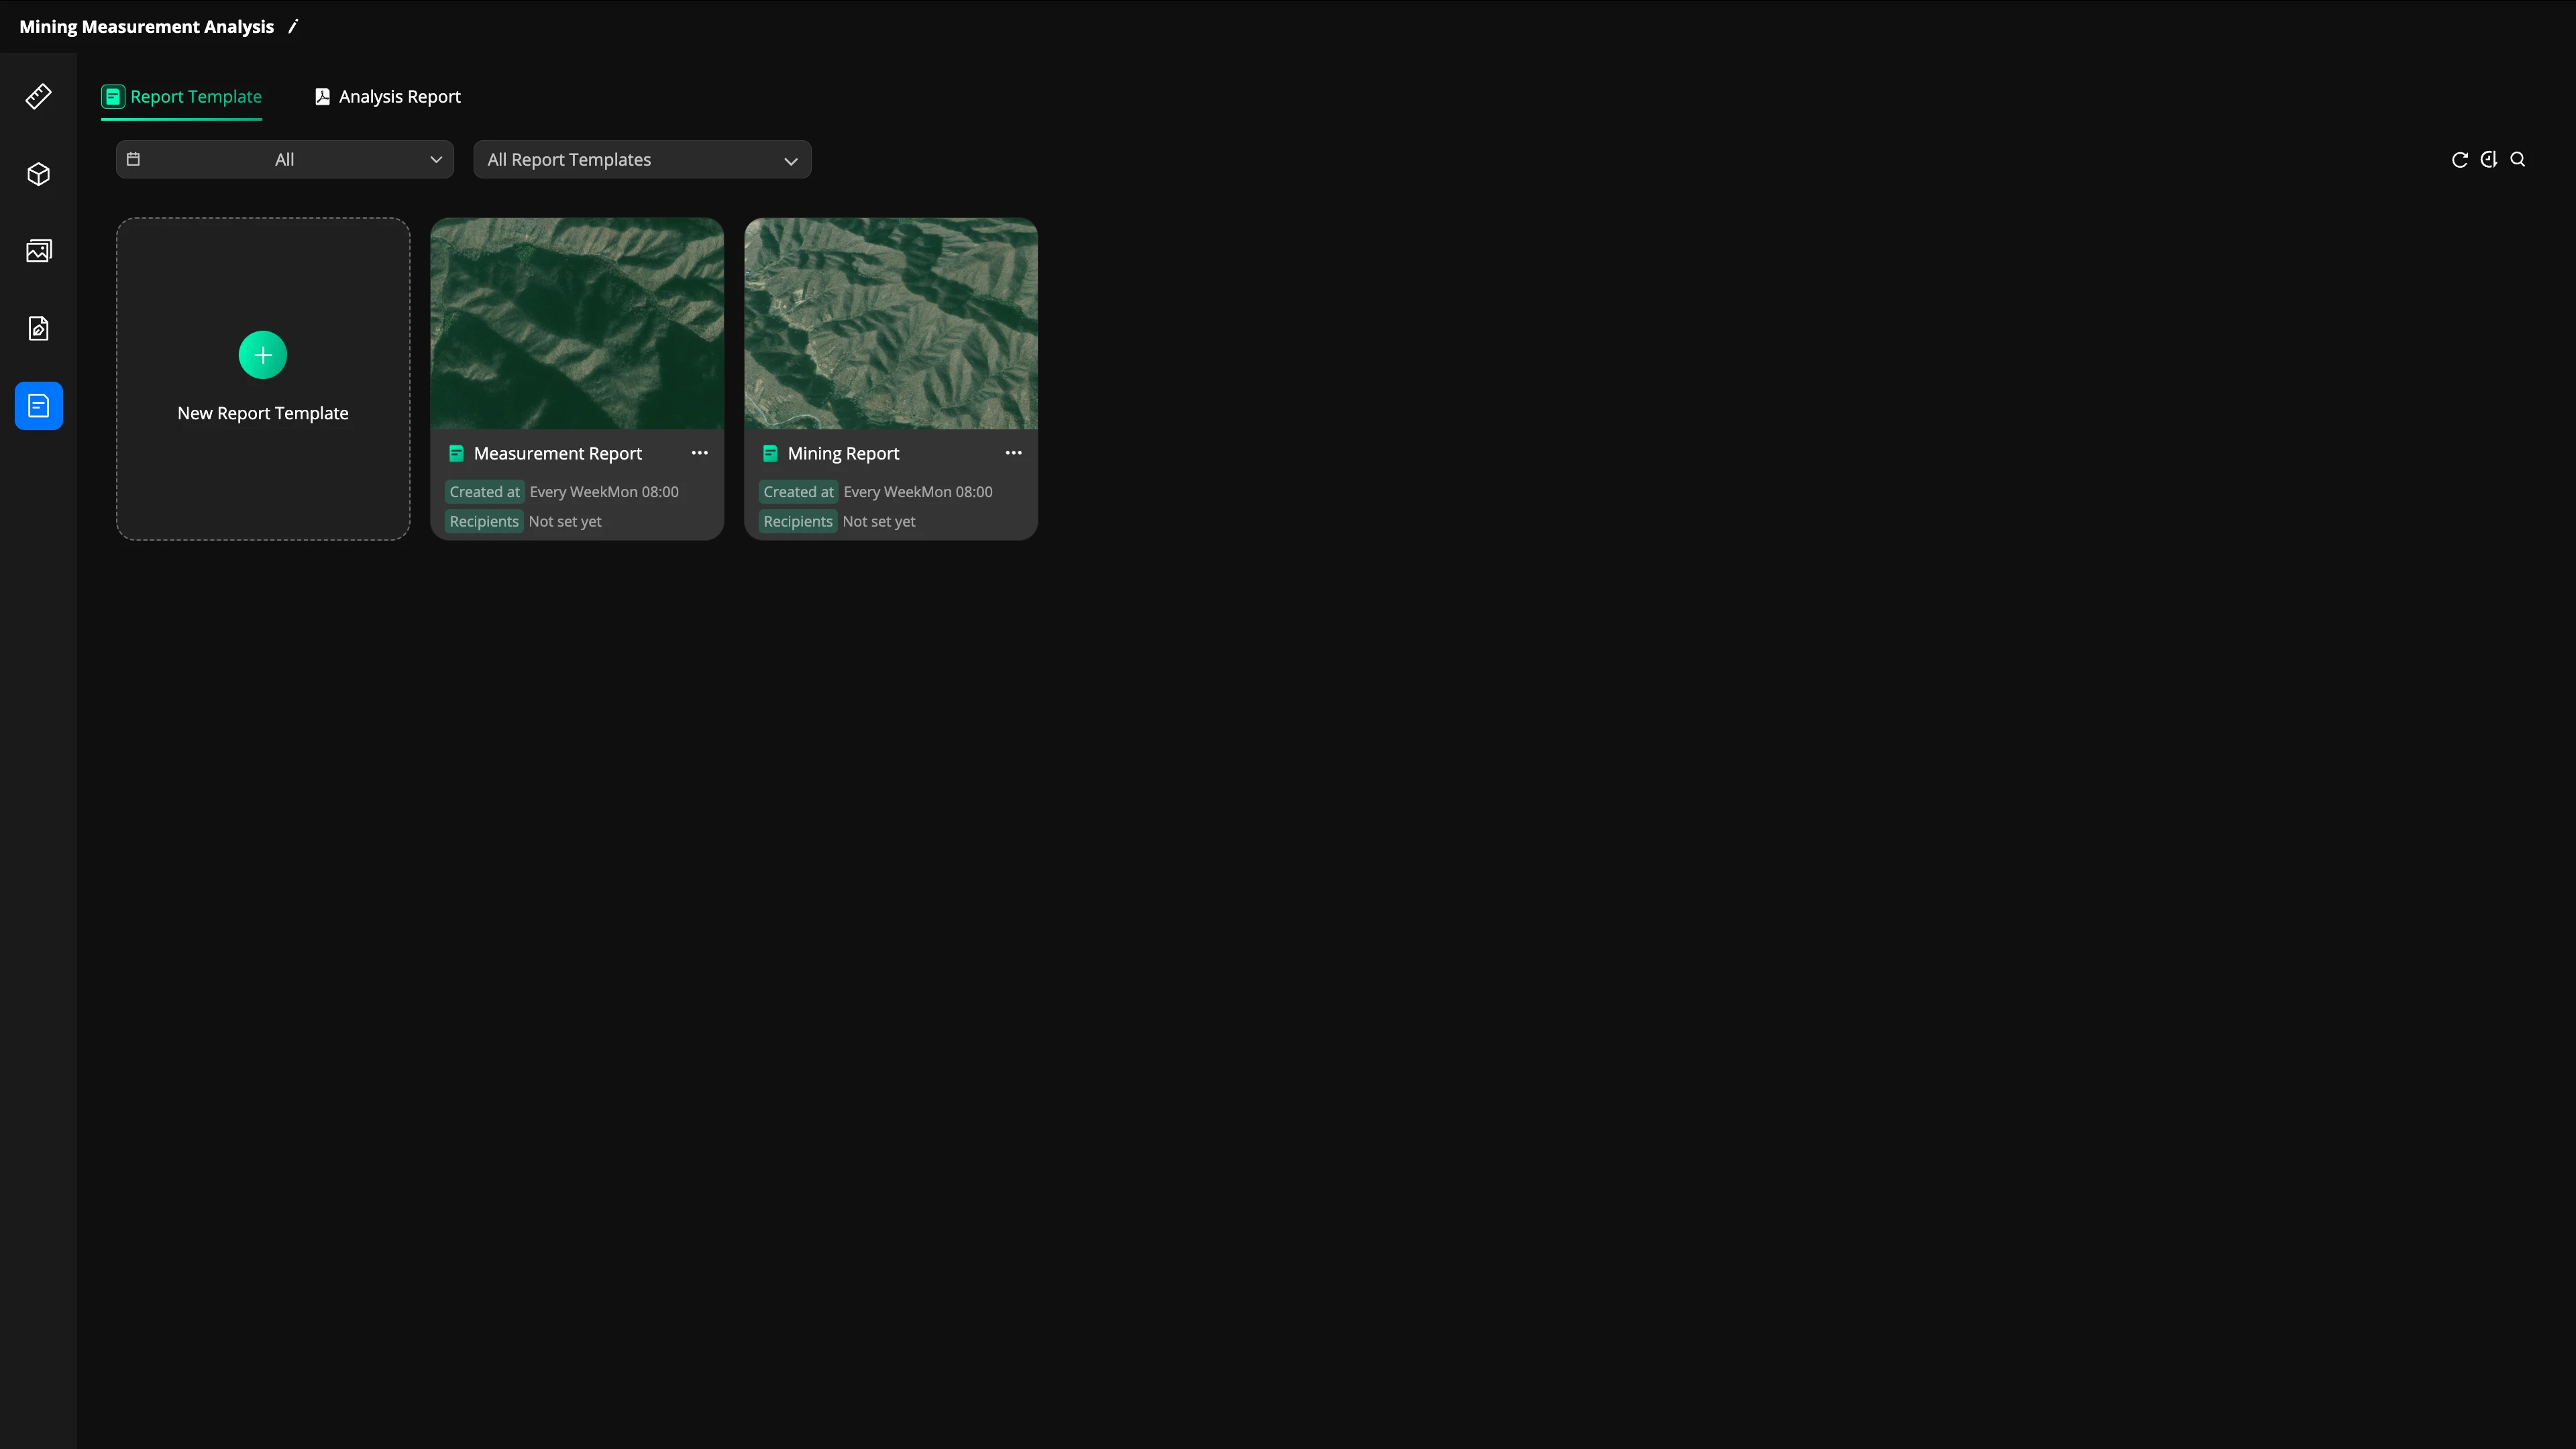
Click "New Report Template" in the report template tab to start a new template. Report templates are designed for content that is repeatedly generated, and are often used together with automated workflows and model sites. This enables a complete process of automated data collection, mapping, and analysis reporting. Users can receive the latest measurement analysis reports on a scheduled basis.
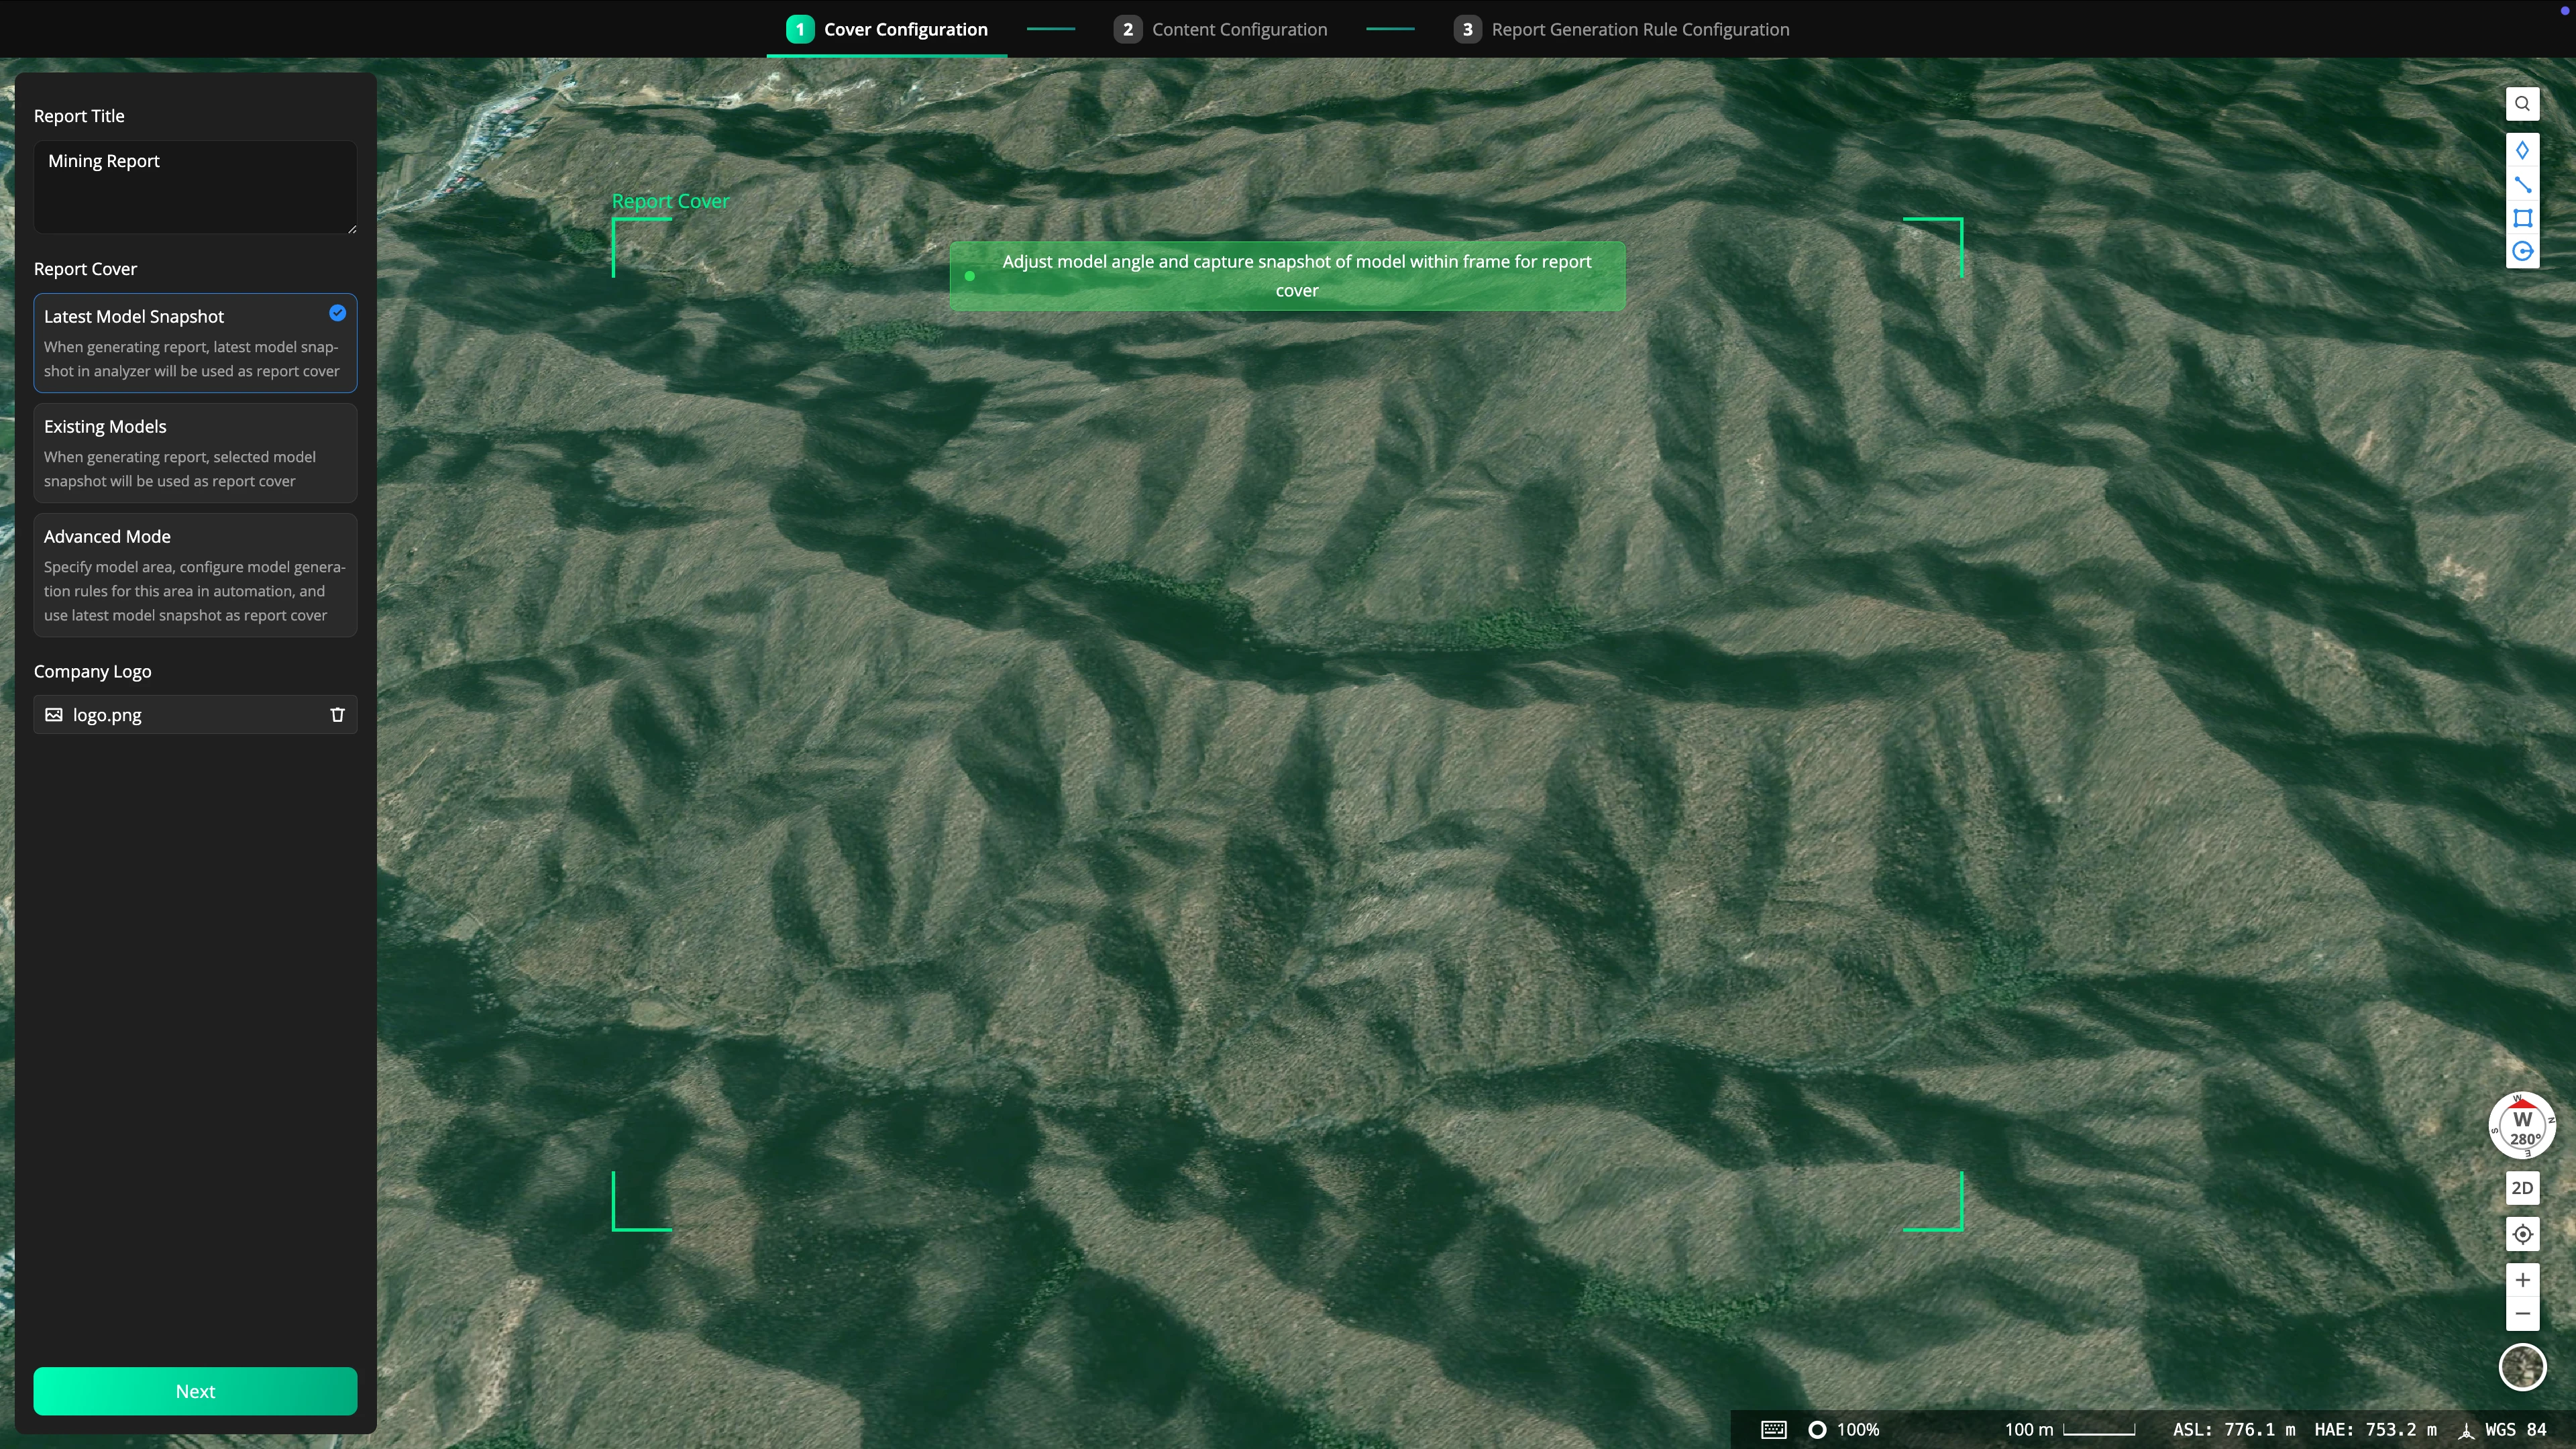
Cover Configuration
- Enter the report title;
- Select a model to display on the report cover:
- Latest Model Snapshot: When generating a report, use the latest model snapshot from the analyzer as the report cover.
- Existing Models: When generating a report, use the selected model as the report cover.
- Advanced Mode: Specify the model site, associate the model generation rules of the area in the automated workflow, and use the latest model of the specified area as the report cover.
- Adjust the model angle on the right map page and capture a snapshot of the model within the frame for the report cover;
- Supports uploading and adding a company logo.
Content Configuration
- Select the measurements to include in the report;
- Select the calculation tools to be used for each measurement;
- Basic measurement: Includes Current Model Volume Calculation, Basic Measurement of Polygon, Triangulation Measurement, and Gradient Measurement.
- Progress Management: Includes Two-Phase Model Volume Change Calculation, Multi-Phase Model Volume Change Calculation, and Extract Cross-Sections
- Advanced Mode: The measurement calculation tool rules include the model site associated with the automated workflow.
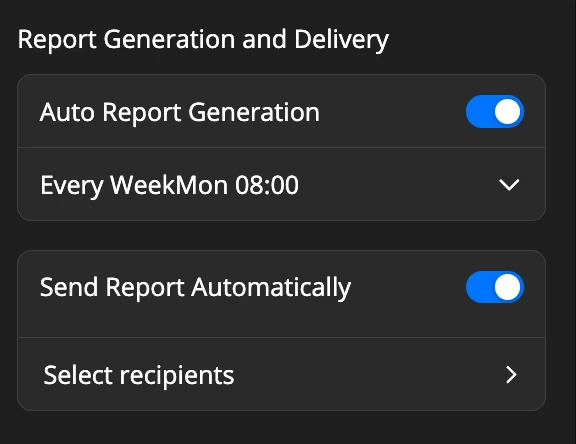
Report Generation and Delivery
- Auto Report Generation
These settings apply to report templates only. It is recommended to use this feature together with automated workflows. Enable Auto Report Generation and set the periodic generation time.
- Note:
- The automatic generation time of the report will affect the measurement calculation of the model site within the report template;
- The automatic generation time of the report should be set after the corresponding automated modeling task time, and sufficient time should be reserved in between for cloud reconstruction.
- Report Sending
Turn on the send switch, set the email recipients, and the latest report generated will be sent automatically.
- Note:The current automatic report sending setting only applies to report templates.
Report Template Management
- Report templates can be filtered by creation time and whether auto-generation is enabled.
- Click on a report template module for more settings, to quickly generate a report, confirm the model, enter report editing, view the report, and access the full history of reports generated from this template.
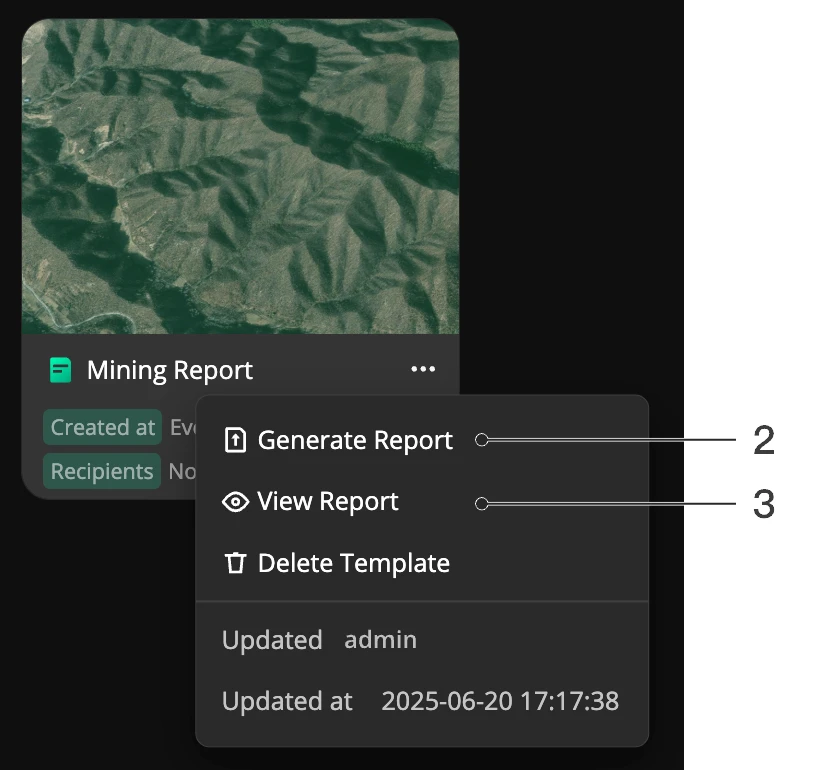
- Click on the report template card to view the report in more settings, and you will be redirected to view the history of all reports generated under this report template
Analysis Report and Management
Create Analysis Report
Click "Create Report" in the analysis report tab to create a new analysis report. The creation process is similar to that of a report template, including cover and content configuration.
Analysis Report Management
- Analysis reports can be filtered by time and by report template.
- Click on the analysis report module for more settings. Enter an email address to share the analysis report file, and quickly download the analysis report file.
Automated Workflow Report
Report templates are designed for content that is repeatedly generated, and are often used together with automated workflows and model sites. This enables a complete process of automated data collection, mapping, and analysis reporting. Users can receive the latest measurement analysis reports on a scheduled basis.
Standard Mode Example
- Create an automated workflow.
- Plan a flight route task, ensuring the mapping area covers the required area, and schedule automatic flight data collection every Sunday at 12:00 noon.
- Create a cloud mapping task and associate it with the flight route task. Configure relevant mapping parameters, and obtain the model every Sunday.
- In the analyzer, draw a polygon for the area to create a measurement. Add the calculation tool "Current Model Volume Calculation", and select "Current Model" as the calculation model.
- In the analyzer, create a new report template. Configure the report cover to display the "Latest Model Snapshot". Choose the previously created measurement for content configuration. Enable basic measurement in the standard calculation rules. Set the automatic report generation time to every Monday at 10:00 AM. Add the recipient’s email address for automatic report sending.
- In the automated workflow, associate the cloud mapping task and the analyzer. This ensures the model is automatically imported into the analyzer every Sunday.
- Note: The analyzer defaults to the current model as the latest model, which means that the measurement P is calculated based on the latest model at the time of report generation for volume calculation. That is, when the report is generated at 10:00 am every Monday, the latest model in the analyzer is the reconstructed model Q from the previous Sunday, and the measurement P is calculated based on this model for the current model volume. The results will be sent to email B in the form of report template J.
Advanced Mode Example
- Create an automated workflow.
- Plan a flight route task, ensuring the mapping area covers the required area, and schedule automatic flight data collection every Sunday at 12:00 noon.
- Create a cloud mapping task and associate it with the flight route task. Configure relevant mapping parameters, and obtain the model every Sunday.
- In the analyzer, draw a polygon for the area to create a measurement. Enable Advanced mode in the upper right corner. Add the calculation tool "Current Model Volume Calculation". Create a new model site. Select "Latest Model" as the model to be calculated.
- In the analyzer, create a new report template. Configure the report cover to select Advanced mode. Choose the newly created model site. For content configuration, select the previously created measurement. Enable Advanced mode and check the basic measurement in the advanced calculation rules. Set the automatic report generation time to every Monday at 10:00 AM. Add the recipient’s email address for automatic report sending.
- In the automated workflow, associate the cloud mapping task and the model site in the report template within the analyzer. This ensures the model is automatically imported into the analyzer every Sunday and becomes the designated model site.
- Note: Compared to the regular mode, the advanced mode allows for the setting of model sites, more precise configuration of specific model calculation rules, and supports multiple model sites. It is often suitable for larger projects that pursue accuracy and require local reconstruction of more refined models.