
Detect Changes Pro
Detect Changes Pro is powered by AI large models. It automatically detects and marks areas of change between two sets of media captured at the same location at different times, helping you quickly identify target changes and defects while significantly reducing the manual effort of comparing photos one by one and lowering the miss rate. You can access Detect Changes Pro from the sidebar entry in the Analyzer (alongside Smart Search), the Detect Changes Pro entry on the media page, or the split-screen comparison page.
Supported Scope
- Media source: Two sets of media folders captured at different times from the same waypoint route task (i.e., photo pairs at the same location, different times).
- Supported photo types: Wide-angle photos (w), zoom photos (z), and infrared photos (ir) from any perspective.
- Currently unsupported types: Panoramic photos.
Feature Entries
Detect Changes Pro provides multiple entries so you can quickly start a detection task from different scenarios:
- From the Media File Library: A Detect Changes Pro entry is available on the timeline of the media detail page, allowing you to import waypoint route media into the Analyzer with one click for analysis.
- From the Analyzer AI entry: In the Analyzer's AI feature entry, select "Detect Changes Pro" (alongside Smart Search).
- From the split-screen comparison page: On the dual-screen media comparison page, start AI change detection directly.
Creating a New Change Detection Task
1. Select the photo pair range
- Select a waypoint route (routes within the Analyzer are shown first; routes outside the Analyzer are also supported).
- Select the two capture times to compare.
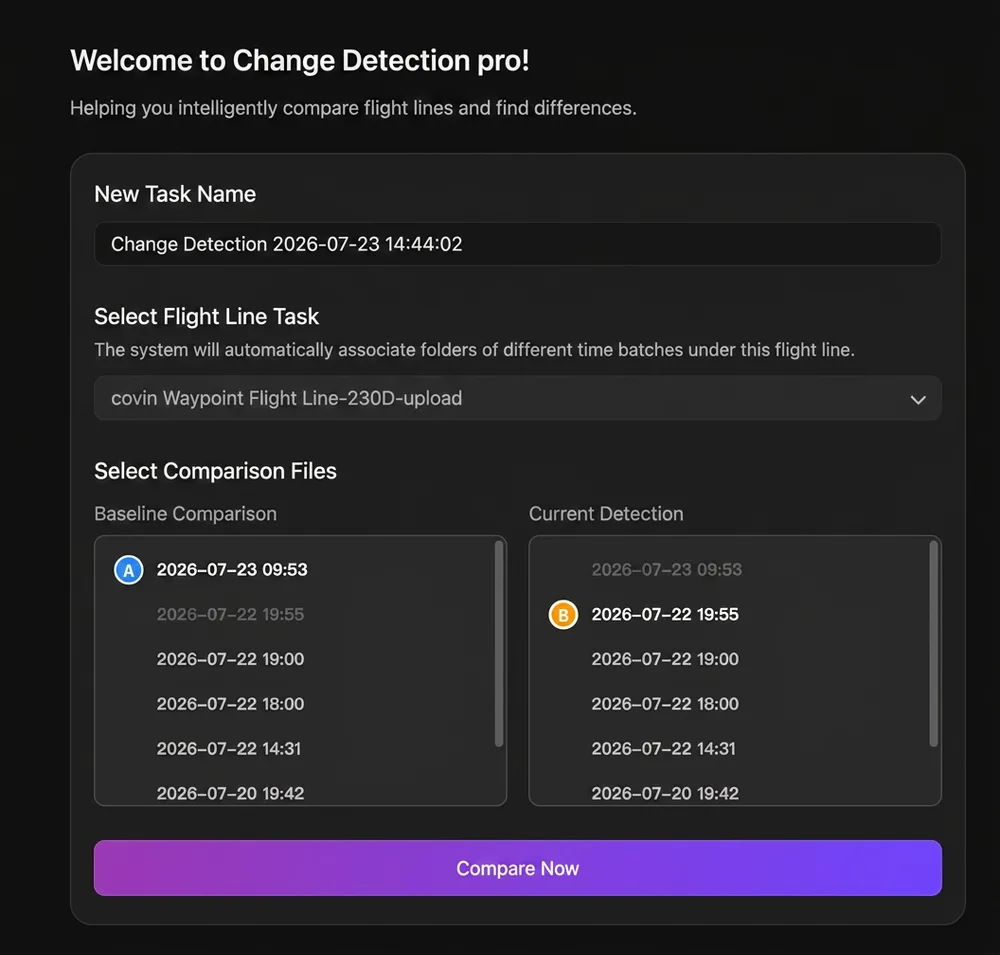
The system automatically matches photo pairs at the same location and different times for comparison.
2. Confirm the detection target
At the current stage, a system default prompt is used to automatically identify and mark most of the changes between the two sets of photos, with no manual input required.
3. Start the detection task
After you click Start Detection, the page displays the detection progress in real time. Once detection is complete, you can review the results.
Reviewing and Editing Detection Results
1. Result preview
- Change annotations are displayed synchronously on both sets of photos in a left-right dual-screen view.
- You can show or hide the change annotations.
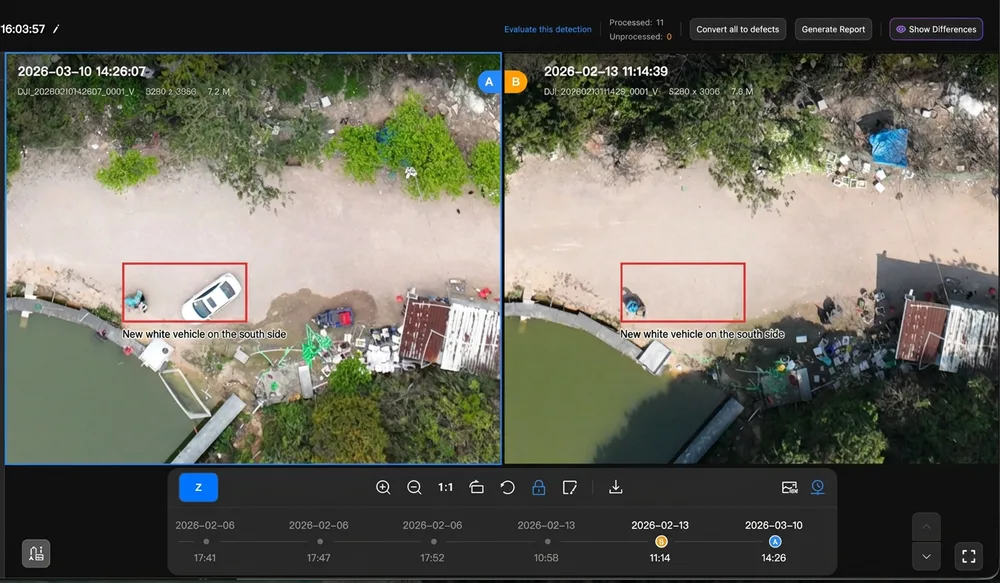
2. Manual editing
You can add, modify, move, or delete change annotations to correct any results that do not meet expectations.
3. Download media
- You can choose to download a single set of waypoint photos.
- The downloaded photos are left-right comparison images stitched from the original photos, with change annotations rendered.
4. Generate an AI report
- You can generate an AI report from the detection results for easy archiving and sharing.
- After manually editing the results, you can refresh and regenerate the report.
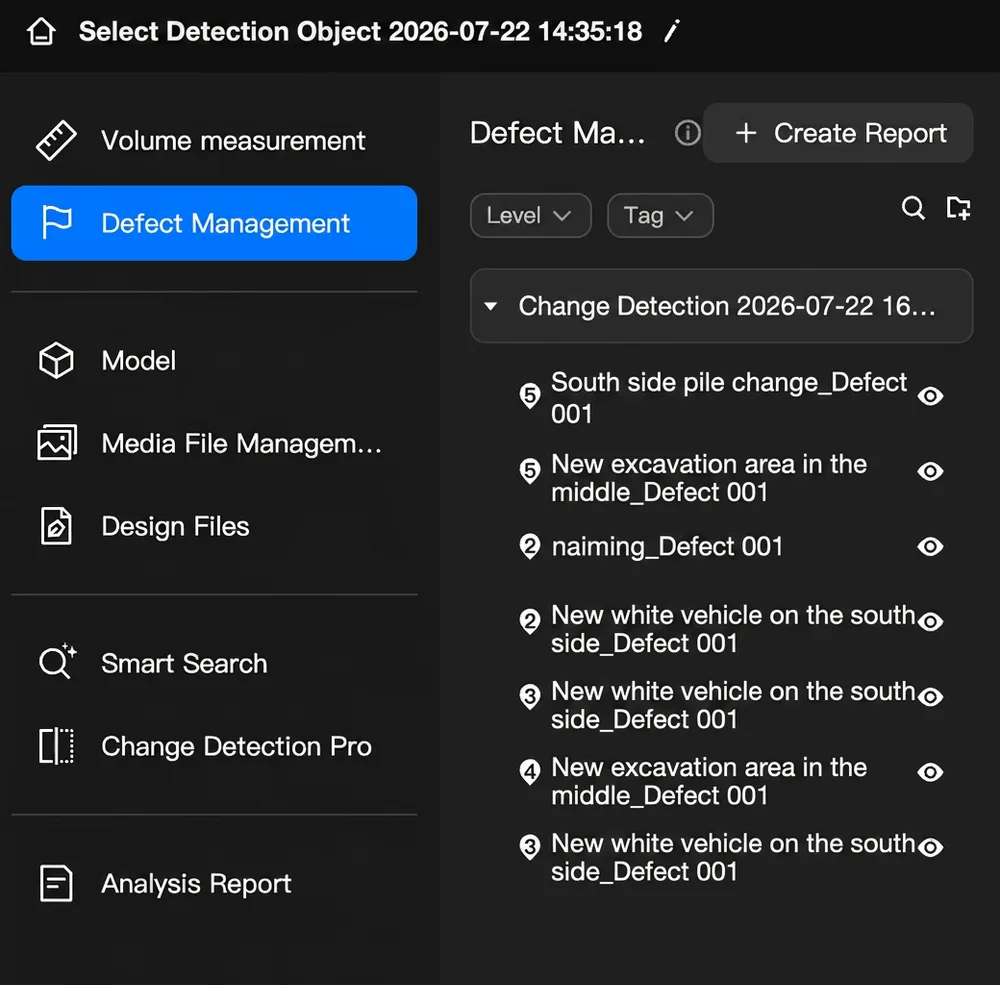
5. Save as defects
- You can save the change results as defects. Defect positions are calculated based on the later set of photos (Set B).
- Defect positions can be displayed on the model and mapped to the map.
- Defect reports can be generated.
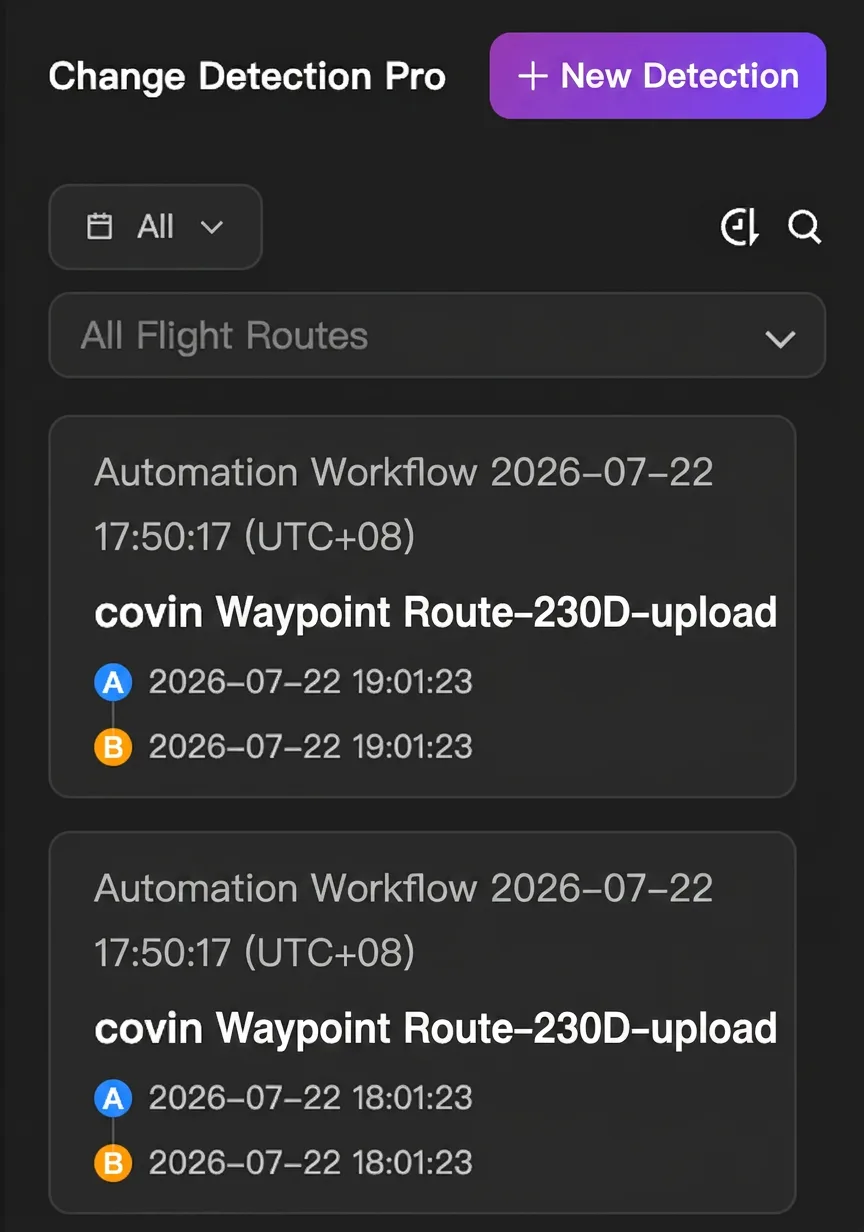
Record Management
Here you can easily create, view, and manage the history of all change detection tasks.
- A historical task consists of one comparison result made up of two sets of photos, with results aggregated by route.
- You can search and filter the history by route and by time.
For On-Premises Users
The on-premises version supports Detect Changes Pro. The large model calls require you to deploy the model yourself, and you can customize the large model used as needed.