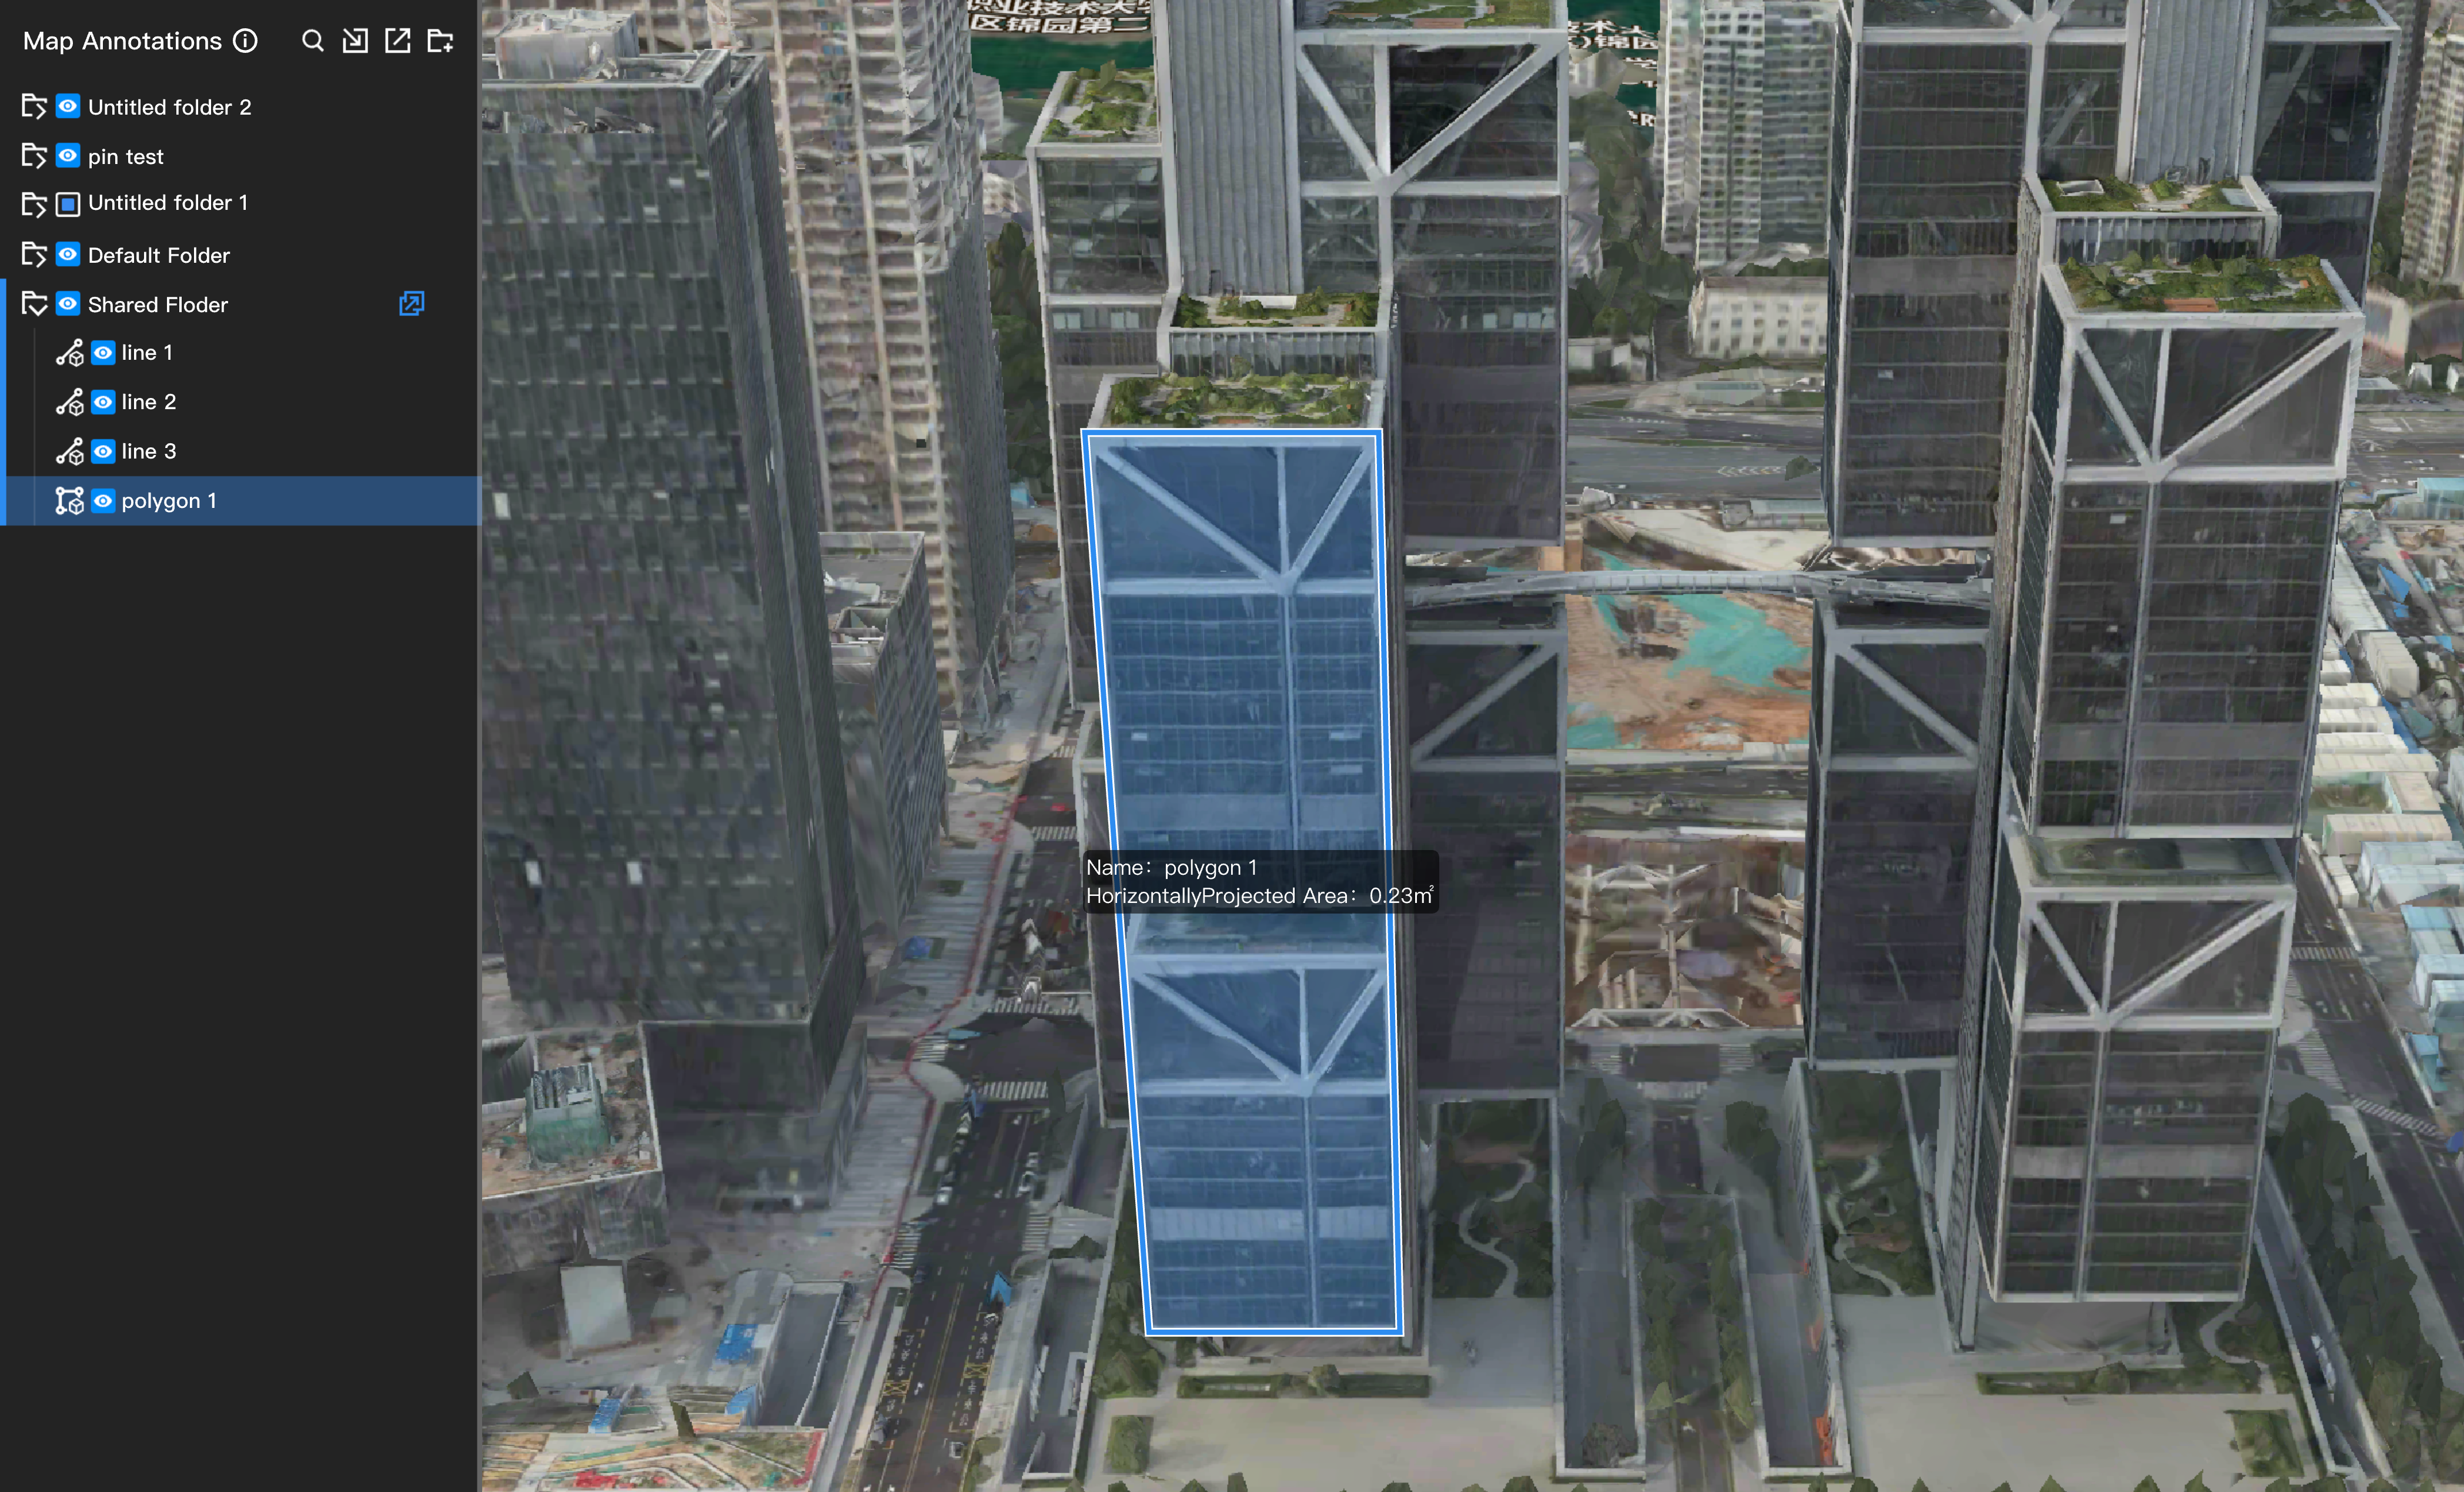
Annotation and Layer Management
Annotation Management
After entering a project, project members can click  on the left to open the annotation interface, then select the icons on the right to draw point, line, polygon, and circle annotations on the map. Project administrators can click
 to distribute annotation folders, sharing annotations from the web interface with DJI Pilot 2. Administrators can also click
 to lock annotations, preventing project members from performing operations on them.
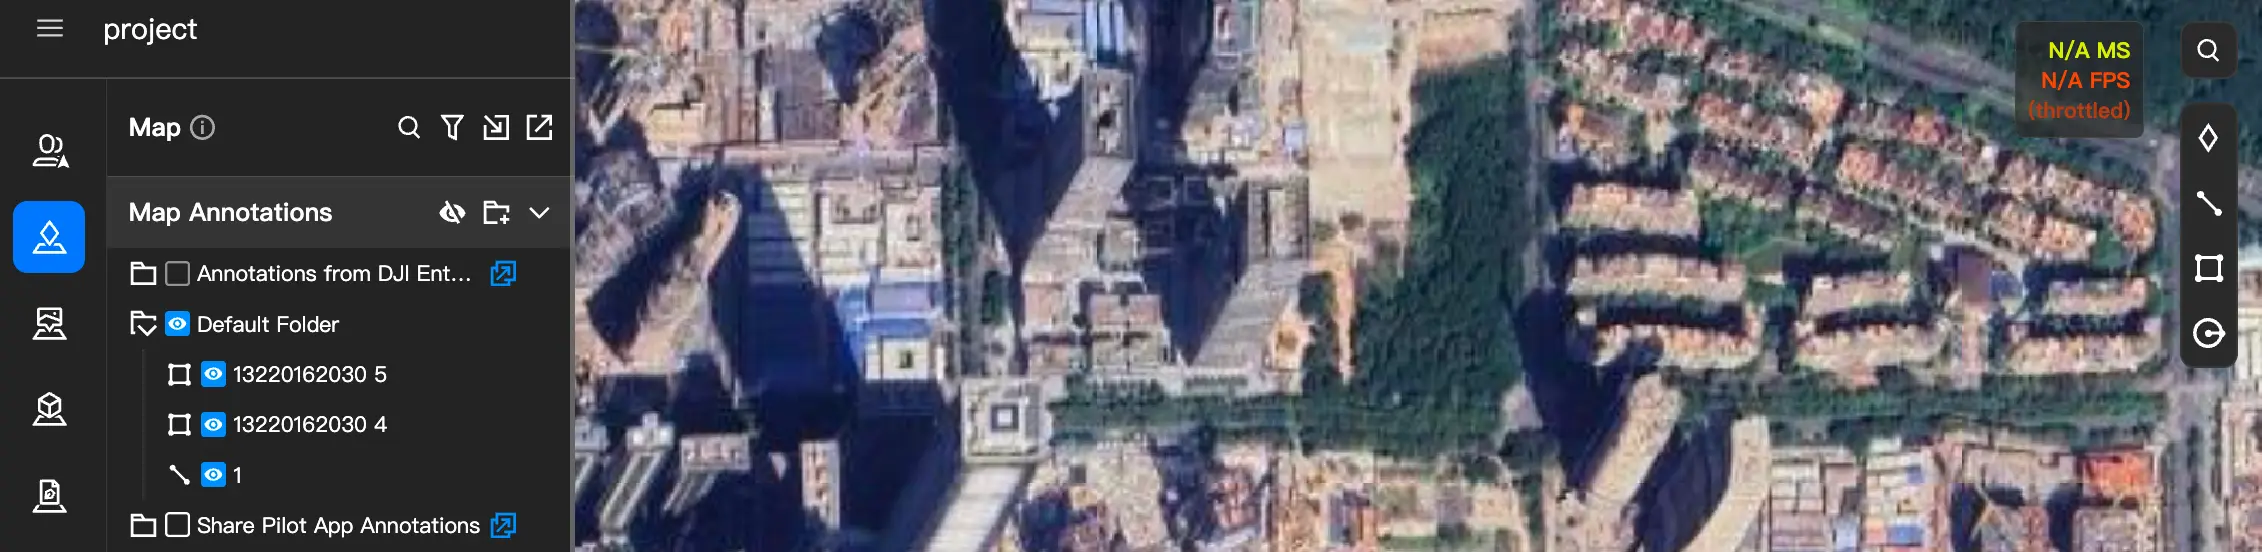
Import Files
Click  to import geographic data files into the project. The following two formats are supported:
- KML / KMZ files: Upload the files directly.
- SHP files: Package the required files into a
.zip filebefore uploading.
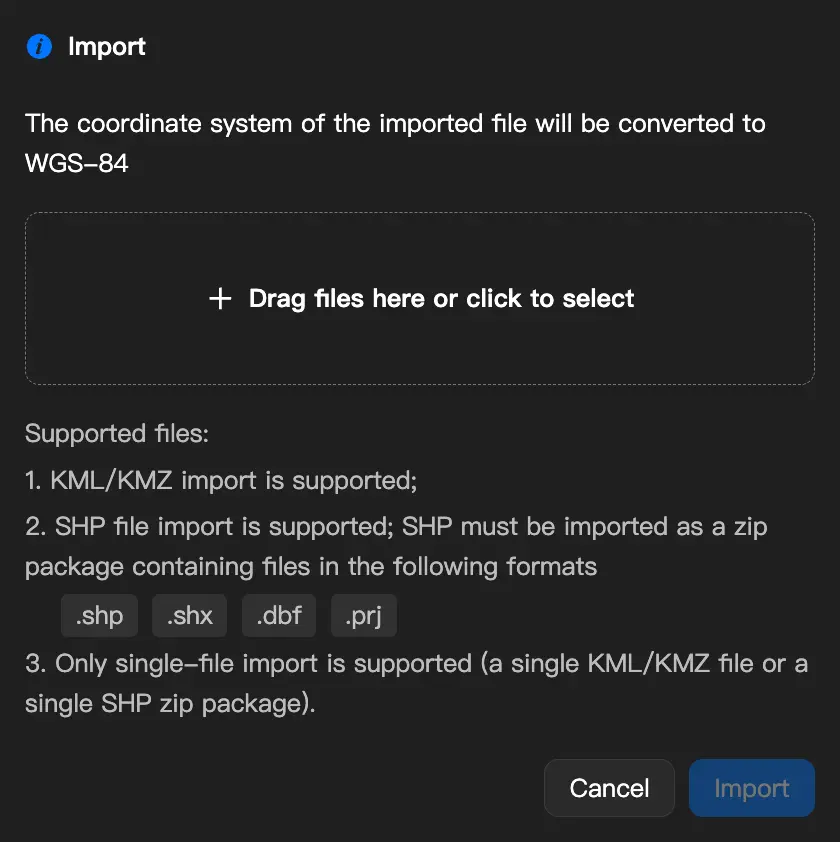
Import KML / KMZ Files
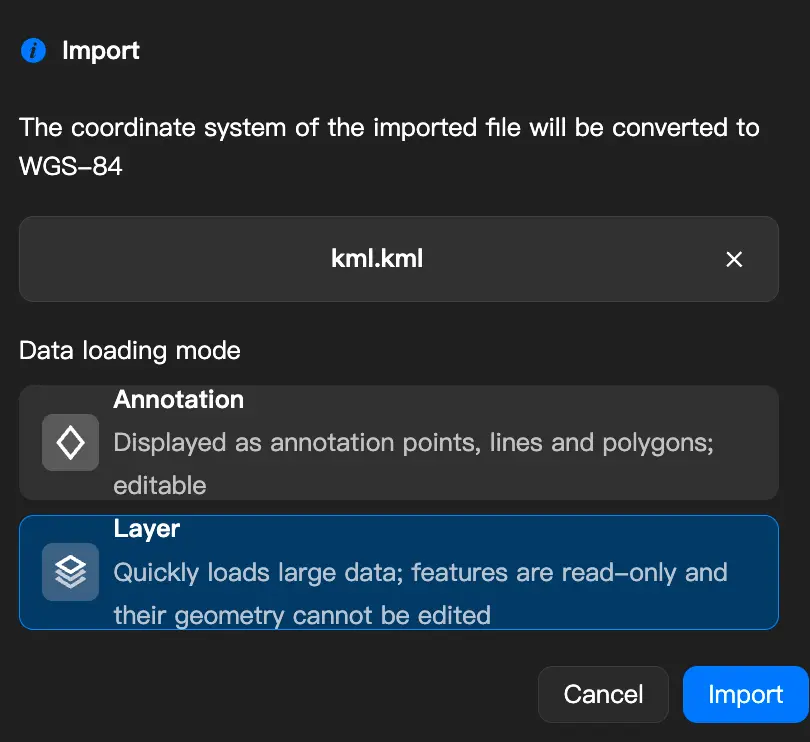
When importing KML / KMZ files, you can choose how the data is loaded:
- Layer (default): Suitable for viewing large datasets, with fast loading and read-only data.
- Annotation: Loads the data as editable annotations, allowing you to modify the shape and attributes of each item individually. Settings such as elevation mode, elevation value, and curve downsampling remain the same as before.
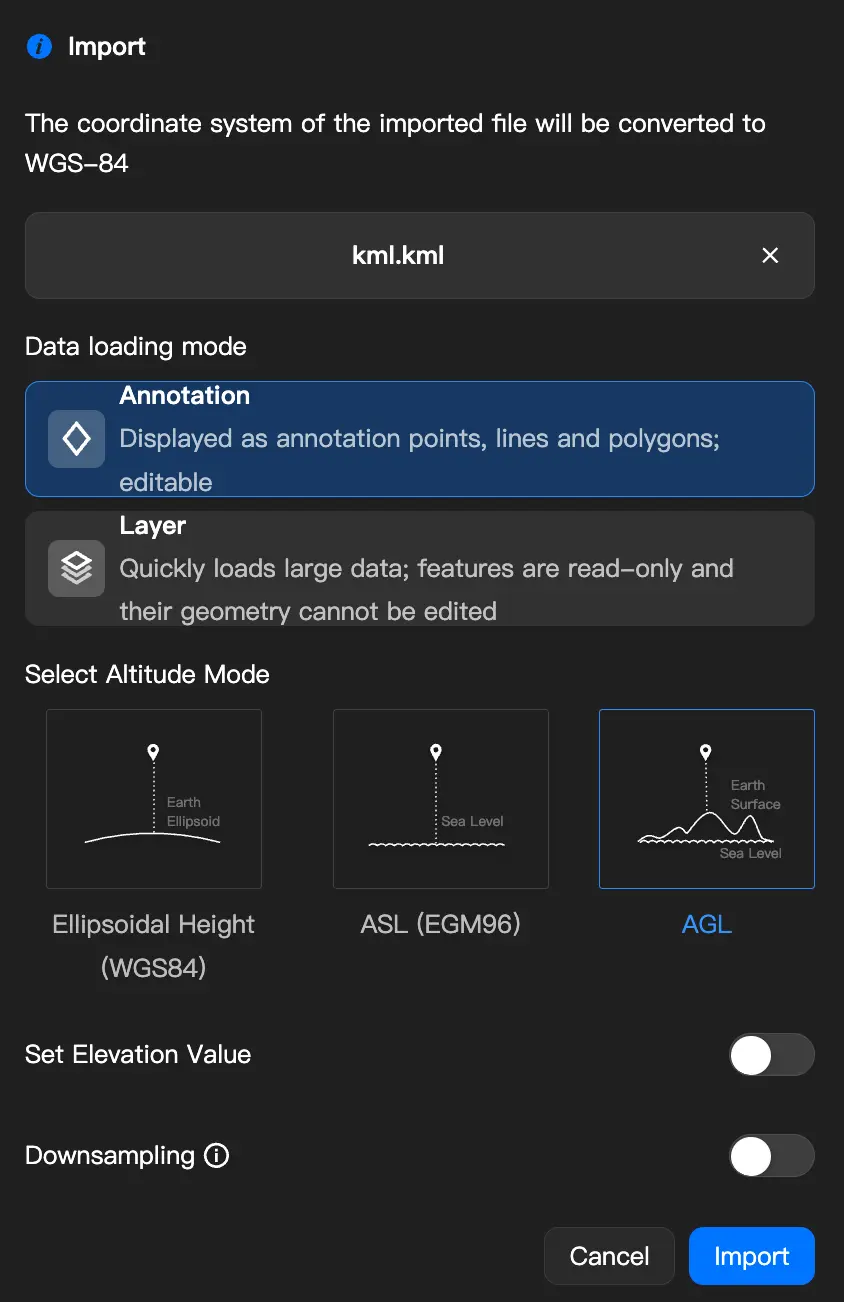
Import SHP Files
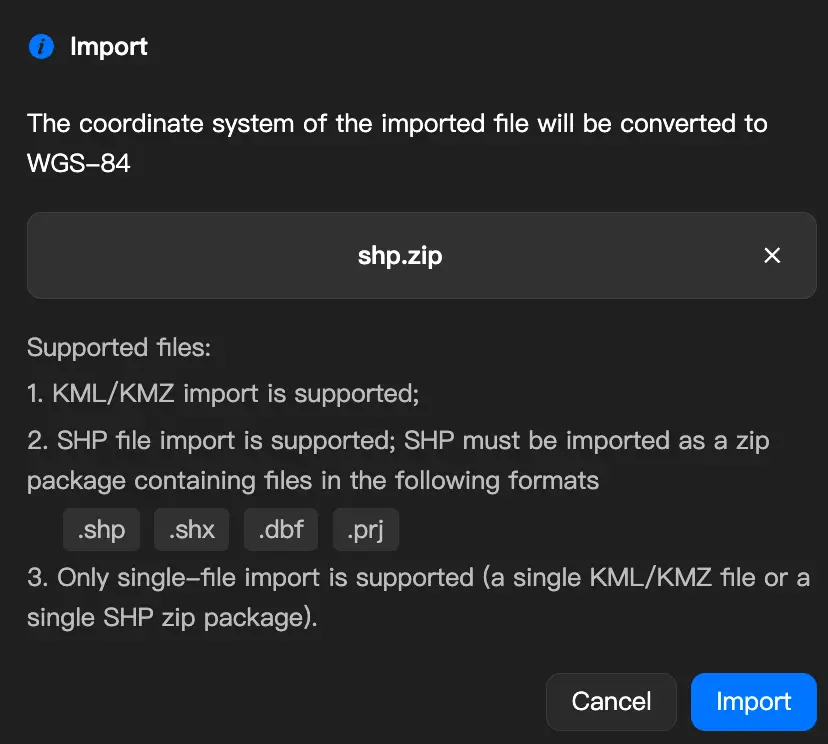
Upload an SHP archive (zip format) by dragging and dropping it or clicking to select it. The zip archive must contain the following files; otherwise, it cannot be imported:
| Required File | Description |
|---|---|
.shp | Geometry data |
.shx | Geometry index |
.dbf | Attribute data |
.prj | Coordinate system definition |
The following geometry types are supported:
| Geometry Type | Description |
|---|---|
| Point | Point |
| Polyline | Polyline |
| Polygon | Polygon |
| MultiPoint | Multiple points |
| PointZ / PolylineZ / PolygonZ | Three-dimensional geometry with Z values |
Note: MultiPatch is not supported. Files containing this geometry type cannot be imported.
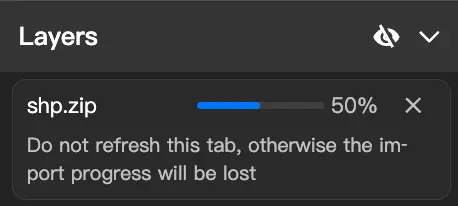
After upload, the system automatically converts the coordinates to WGS-84 and parses the data. You can track the import progress using the progress bar.
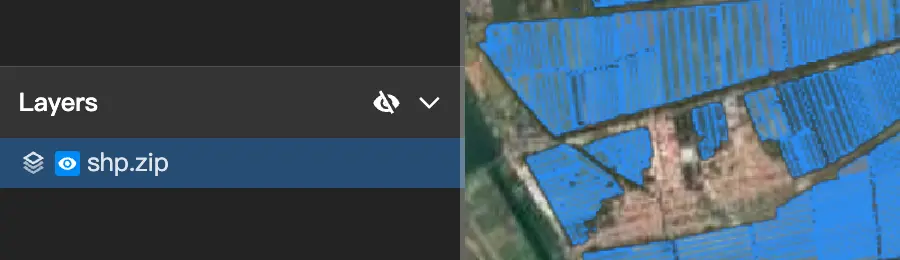
Once the import is complete, the data appears directly on the map, and a corresponding entry appears in the "Layers" section of the left panel.
If the import fails, the system displays the specific reason, such as missing files, an unsupported geometry type, or a network error. Follow the instructions to resolve the issue, then upload the files again.
Export Files
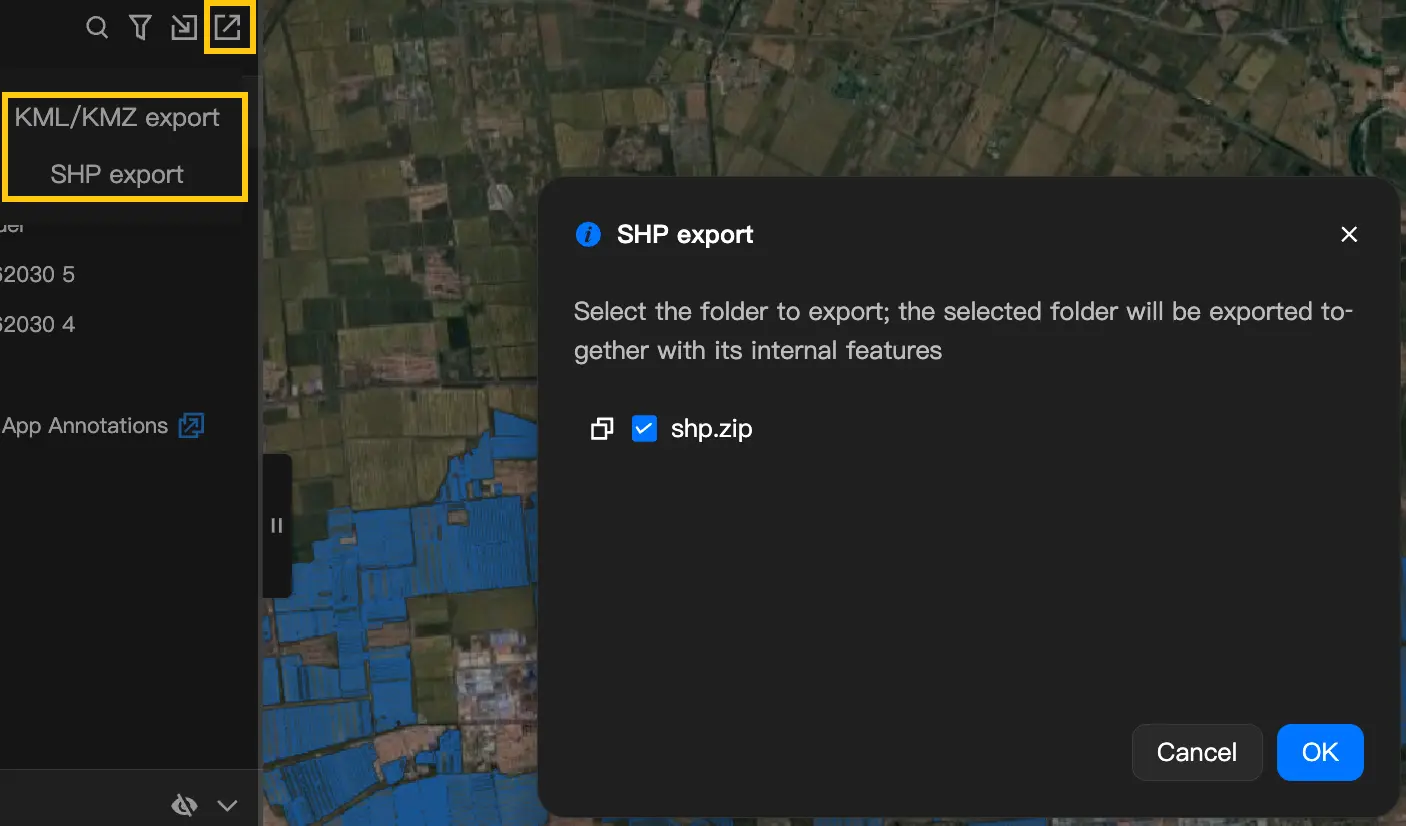
Click  to export an annotation folder as a file for sharing or use in other software. Select a format before exporting:
- KML/KMZ export: Exports annotation data. Simply select the folder to export.
- SHP export: Exports layer data as a zip archive in SHP format. You can export a single file or an entire folder.
Layer Management
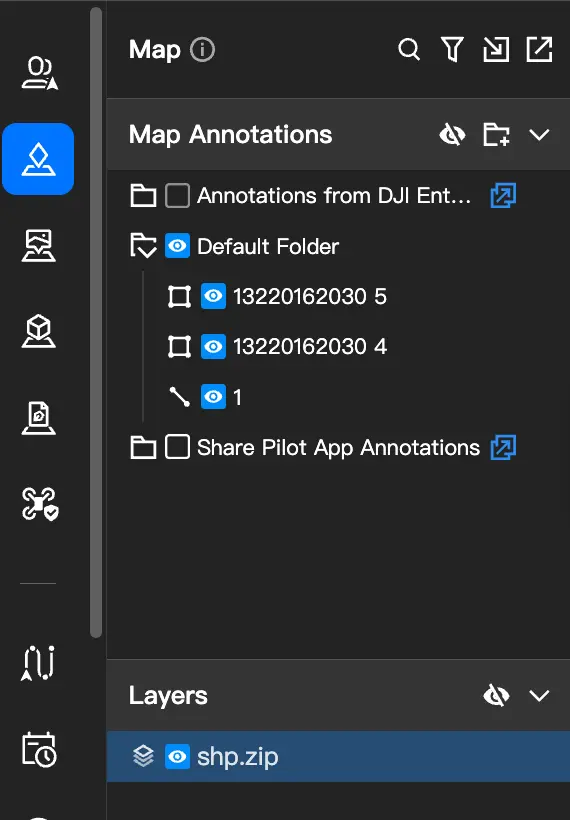
When a project contains layer data (from importing SHP files or loading KML files as layers), the left panel is divided into two sections:
- Annotations (top): Manages manually drawn annotations and KML data imported as annotations.
- Layers (bottom): Manages SHP layers and KML data imported as layers.
If a project contains only annotations or only layers, the panel is not divided into sections.
Showing or hiding annotations and layers affects only your view and does not affect other project members.
View and Configure SHP Layers
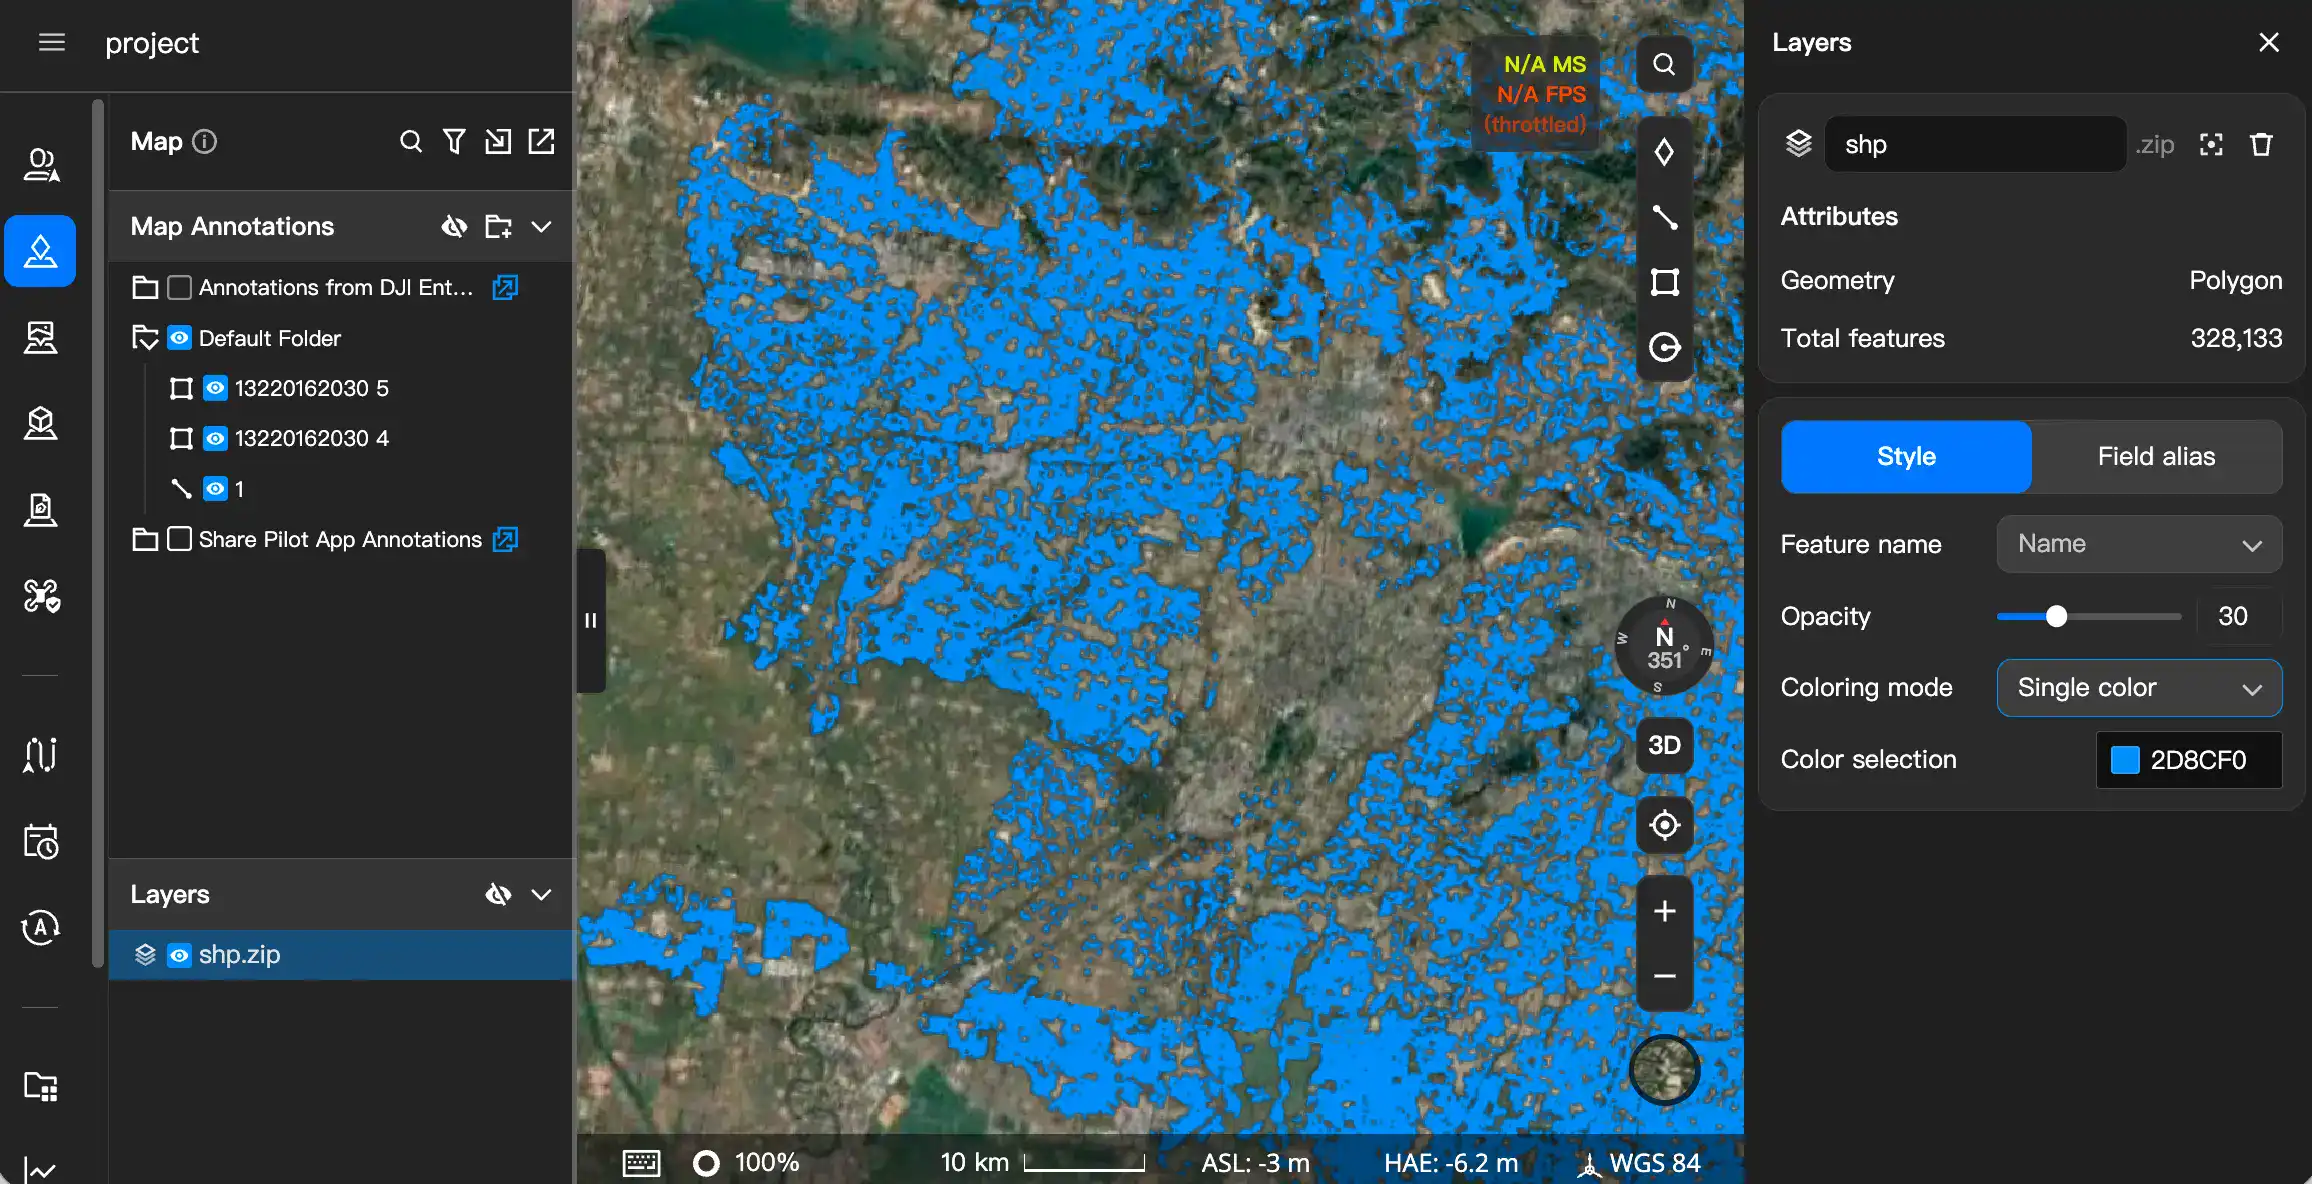
Click an SHP file in the Layers section to open the settings panel on the right. You can perform the following operations on the layer:
Center on Map: Quickly center the map on the area containing the layer.
Delete: Deletes the layer after asking for confirmation.
Rename: Click the name to edit it. You can also copy the name.
View Properties: Displays the geometry type (such as polygon, line, or point) and the number of data items.
Adjust Style:
- Single Color: Applies the same color to all data.
- Categorized Coloring: Select a field (such as region name), and the system automatically assigns a different color to each distinct value. Each color can be modified individually.
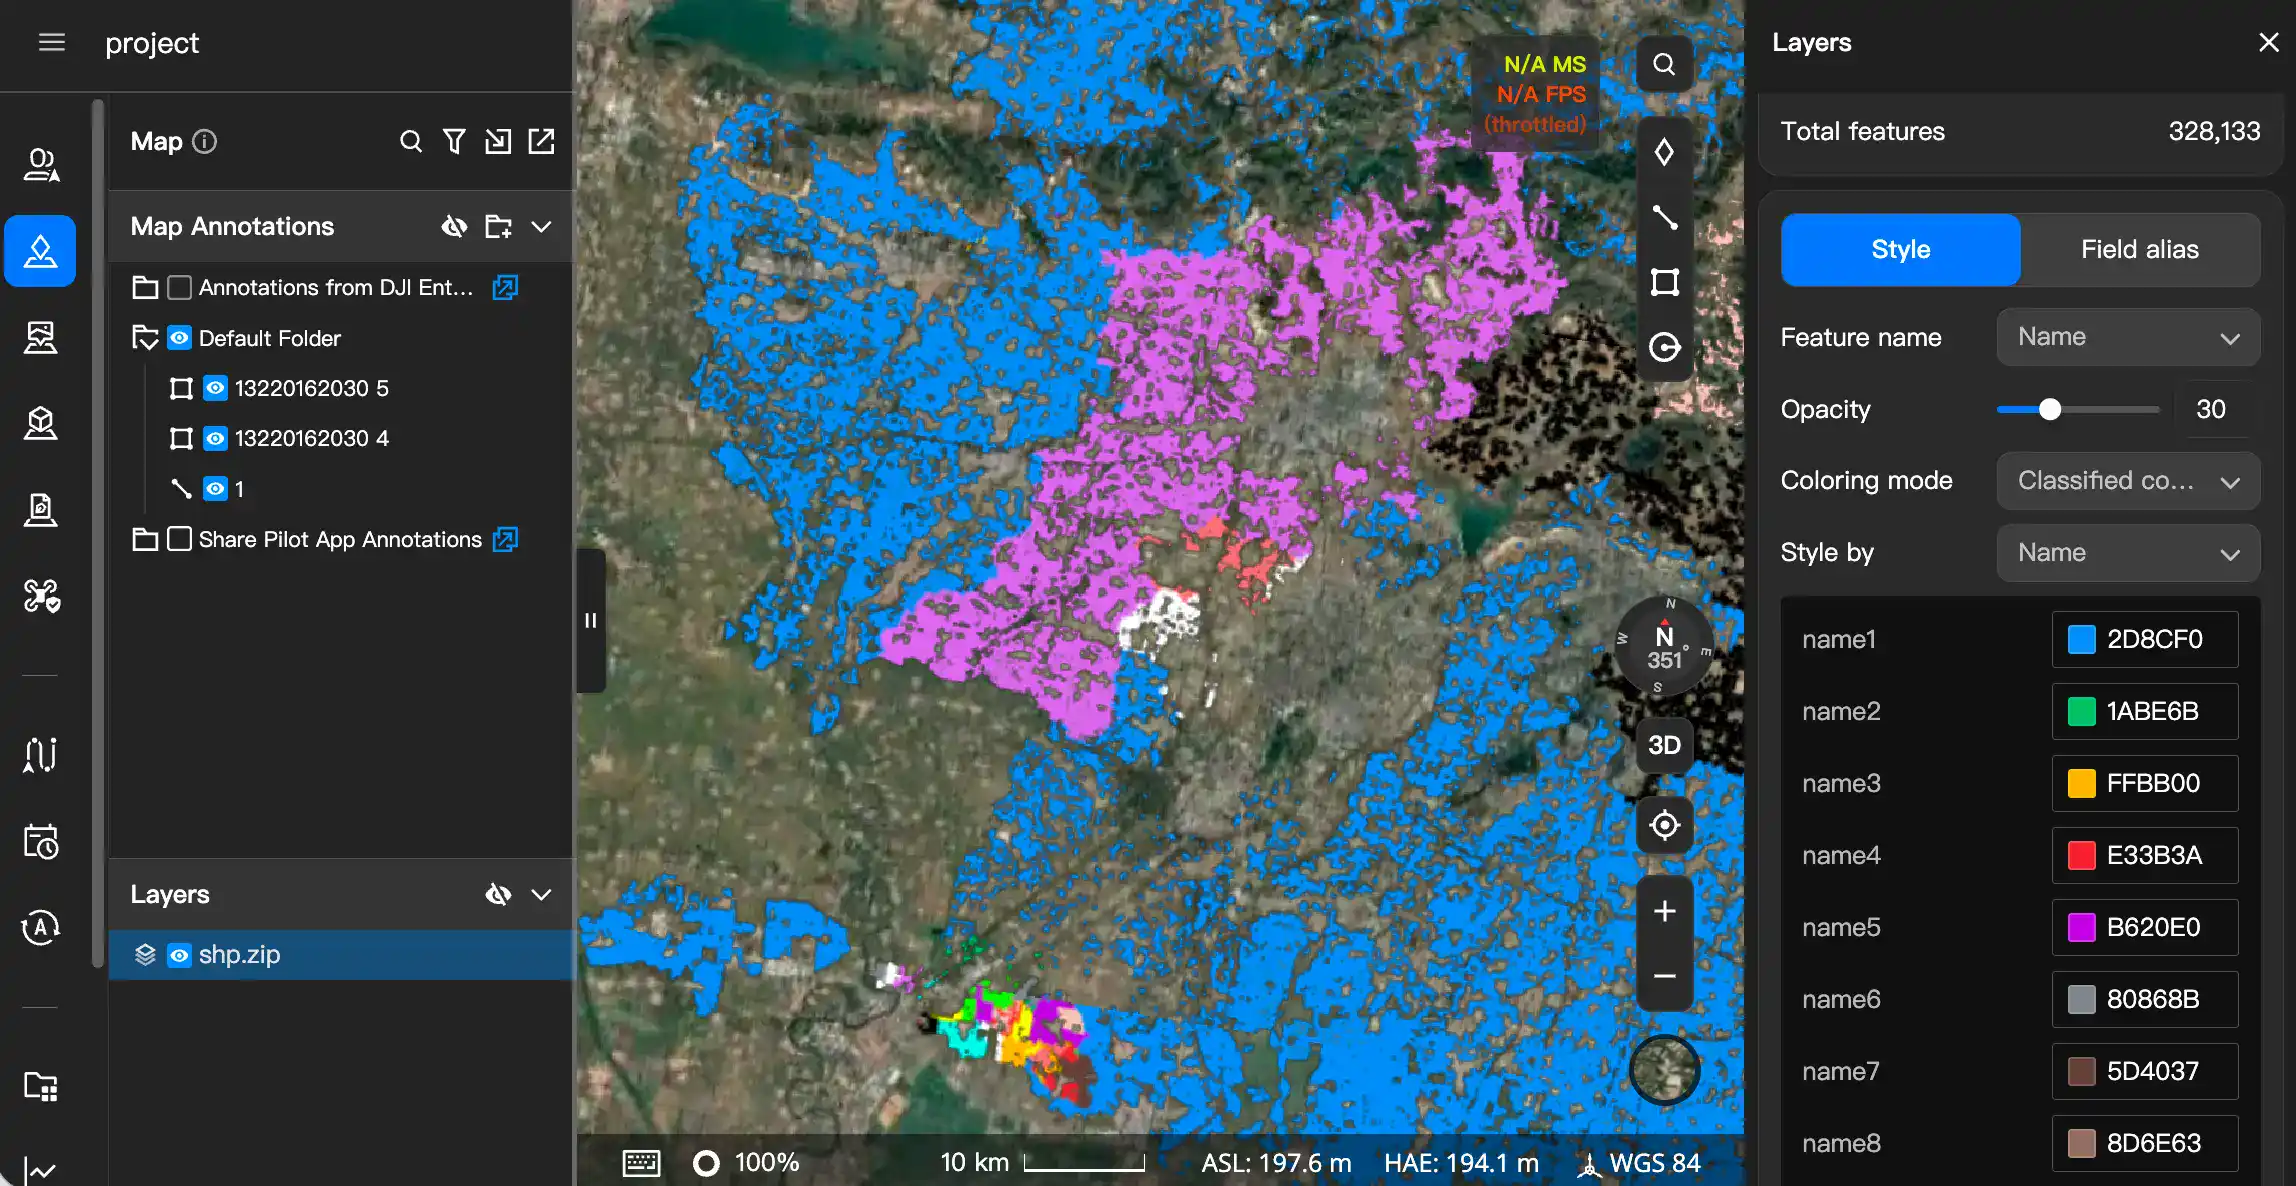
- You can also adjust the opacity, choose whether to show name labels on the map, and set their font size.
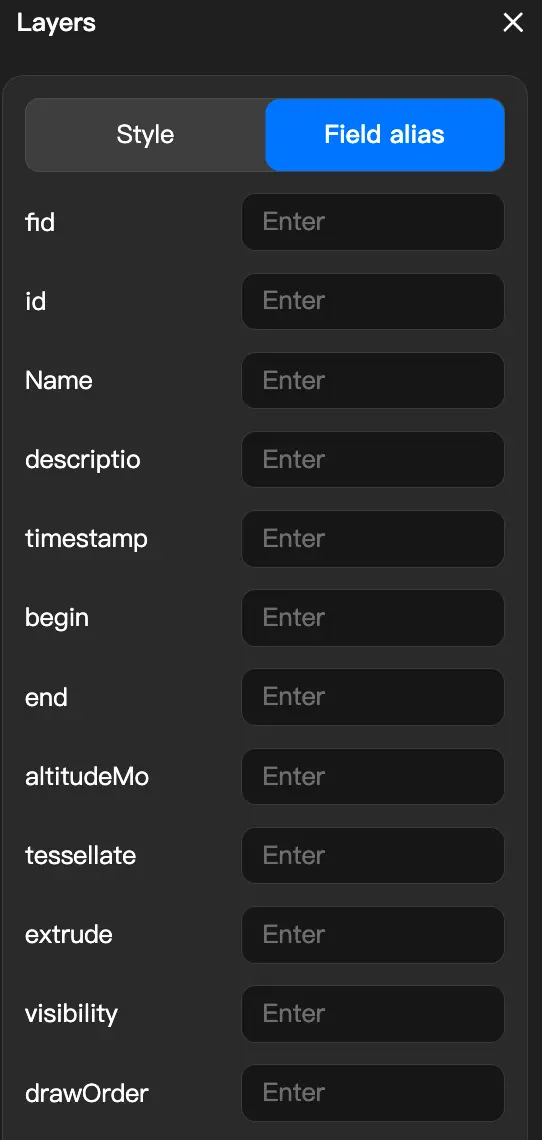
Set Field Display Names: Field names in SHP files are typically English abbreviations. You can set a more understandable Chinese field display name for each field. These names will be used wherever the fields appear.
View and Configure KML Layers
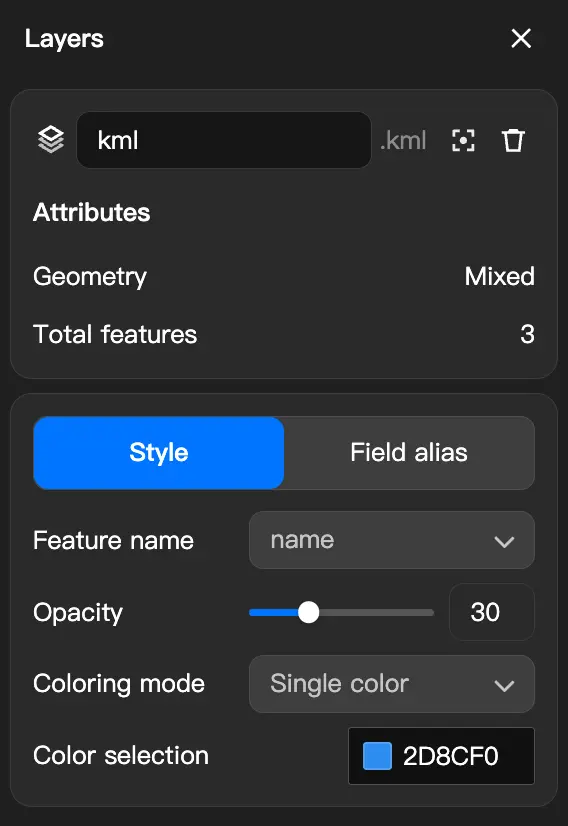
Click a KML layer file in the Layers section to open the settings panel on the right. You can edit the following:
- Opacity.
- Coloring method.
- Field aliases.
View Individual Data Items in a Layer
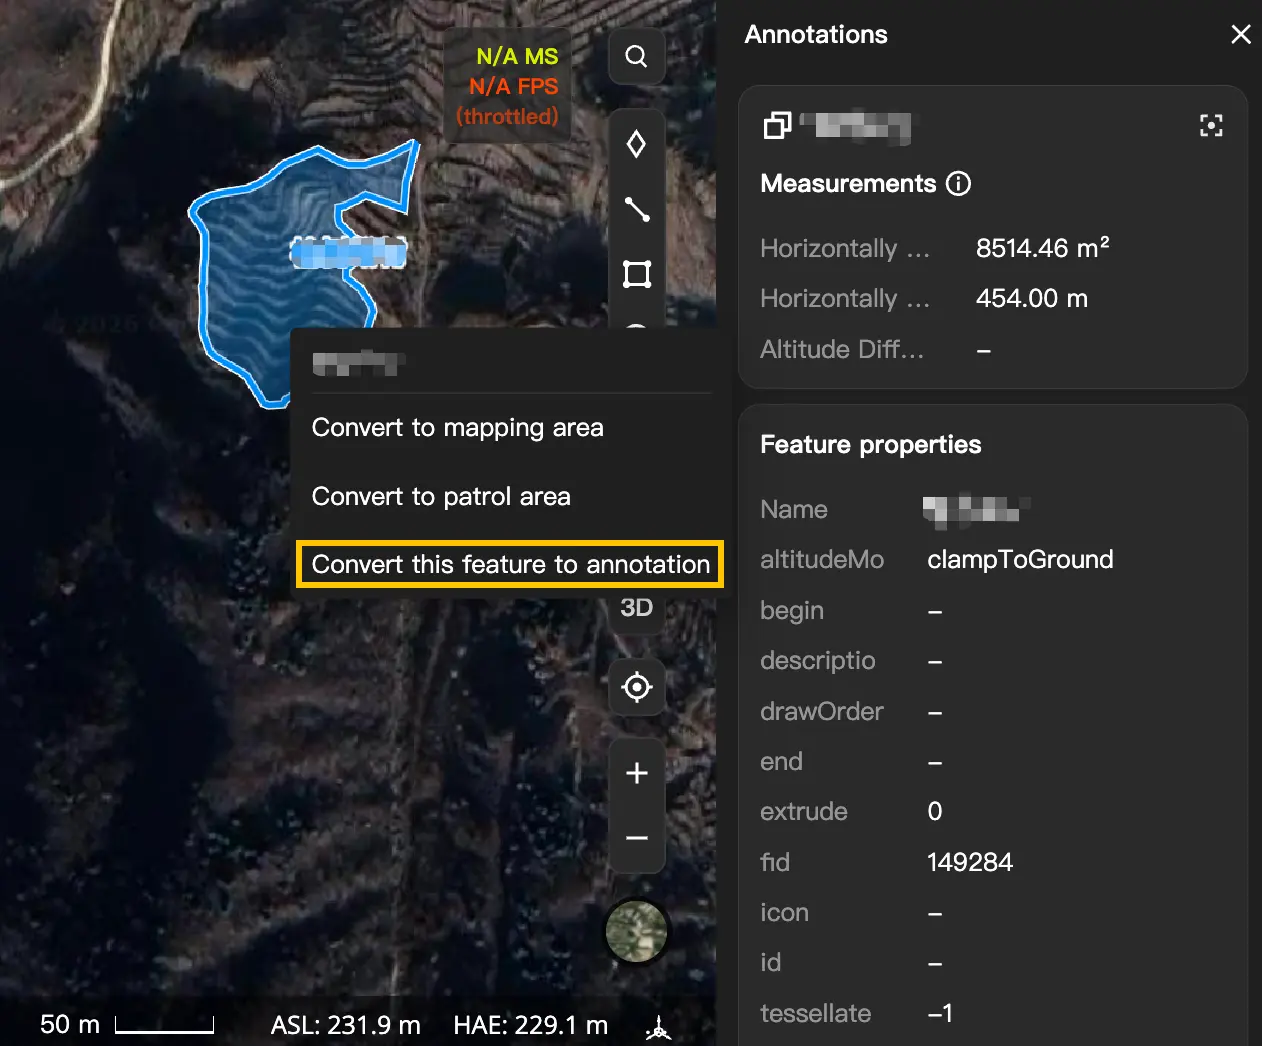
Click an individual data item in a layer on the map, such as an area, a route, or a point, to display its details on the right, including its name, measurements, and attribute fields. This information is read-only and cannot be edited directly.
To edit the data, right-click the item and select "Create Annotation". The system copies it to an editable annotation without affecting the original layer data.
Convert Between Annotations and Layers
Annotations and layers can be converted into each other. They differ as follows:
- Annotations: Allow you to edit the shape and attributes of each item individually, but large numbers of annotations may affect map responsiveness.
- Layers: Suitable for viewing large datasets, with fast loading and no impact on map responsiveness, but the data is read-only.
Convert Annotations to a Layer
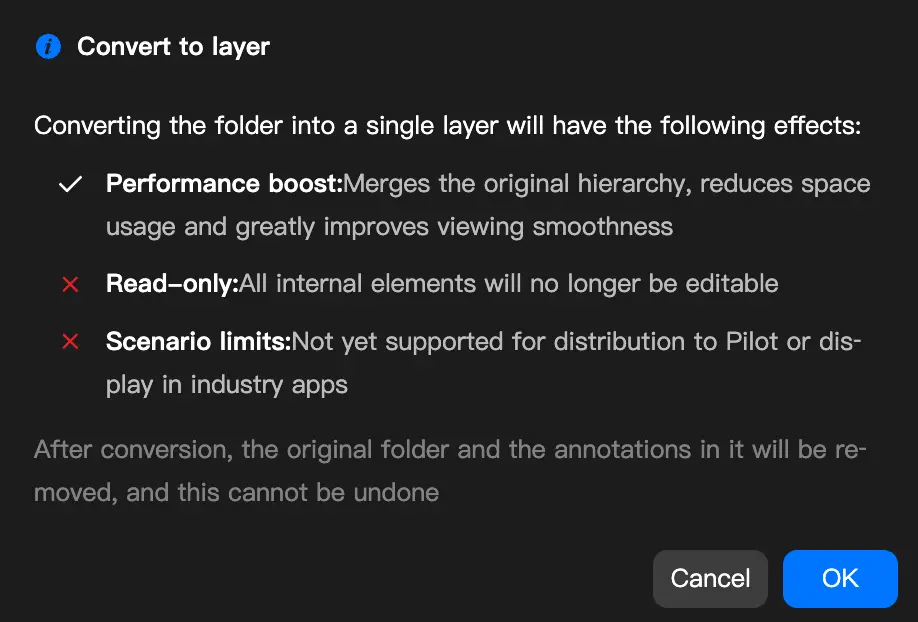
If a large number of annotations reduces map responsiveness, or you no longer need to edit them individually, you can convert an annotation folder to a layer:
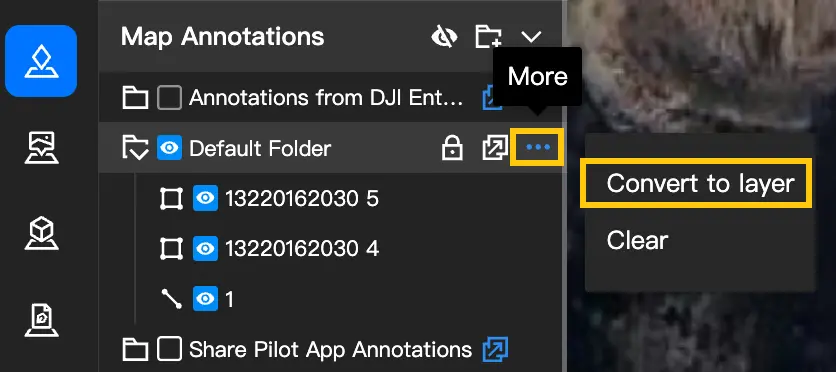
- Hover over the annotation folder and click the "···" button on the right.
- Select "Convert to Layer".
- Click "OK" in the confirmation dialog.
After conversion, the folder moves from the Annotations section to the Layers section. The data becomes read-only when converted to a layer, and you can no longer edit the shape of individual annotations.
Convert a Layer to Annotations
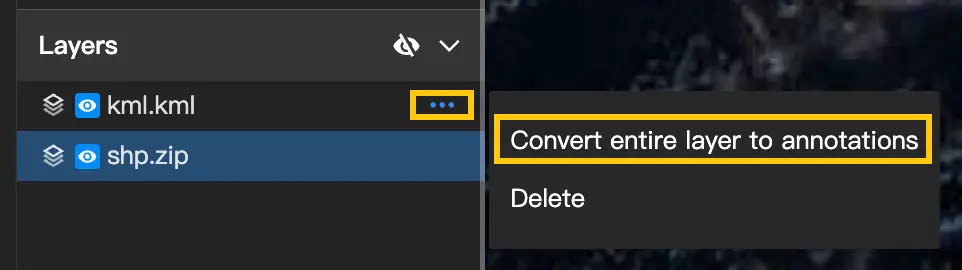
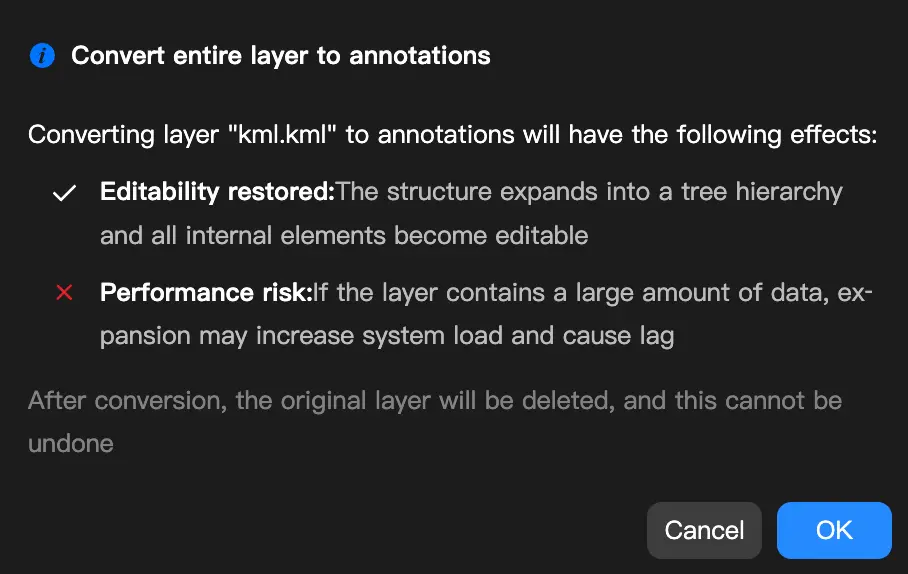
If you need to edit individual data items in a layer, you can convert a KML layer to annotations:
- Right-click a KML layer file in the Layers section.
- Select "Convert to Annotation".
- Click "OK" in the confirmation dialog.
Converting a layer containing a large amount of data to annotations may affect map responsiveness. Decide whether to convert it based on your needs.
Search
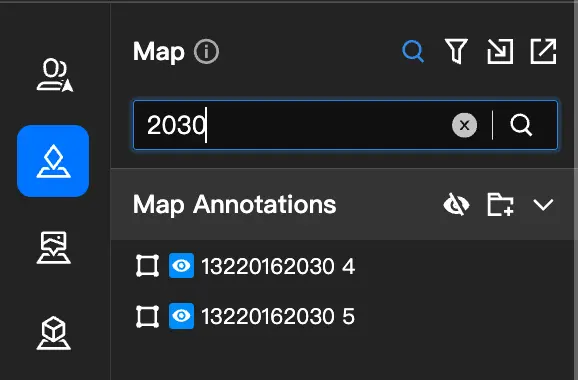
Click the search icon at the top of the panel to quickly find data in annotations and layers. Matching results appear in real time as you enter keywords. Search supports partial matches and is case-insensitive.
- Search results are displayed in a flat list. Hover over a result to display its folder path, and click to quickly navigate to that folder.
- During a search, data visibility and lock status remain unchanged, and import and export functions are unaffected.
DJI Pilot 2 Annotation Synchronization
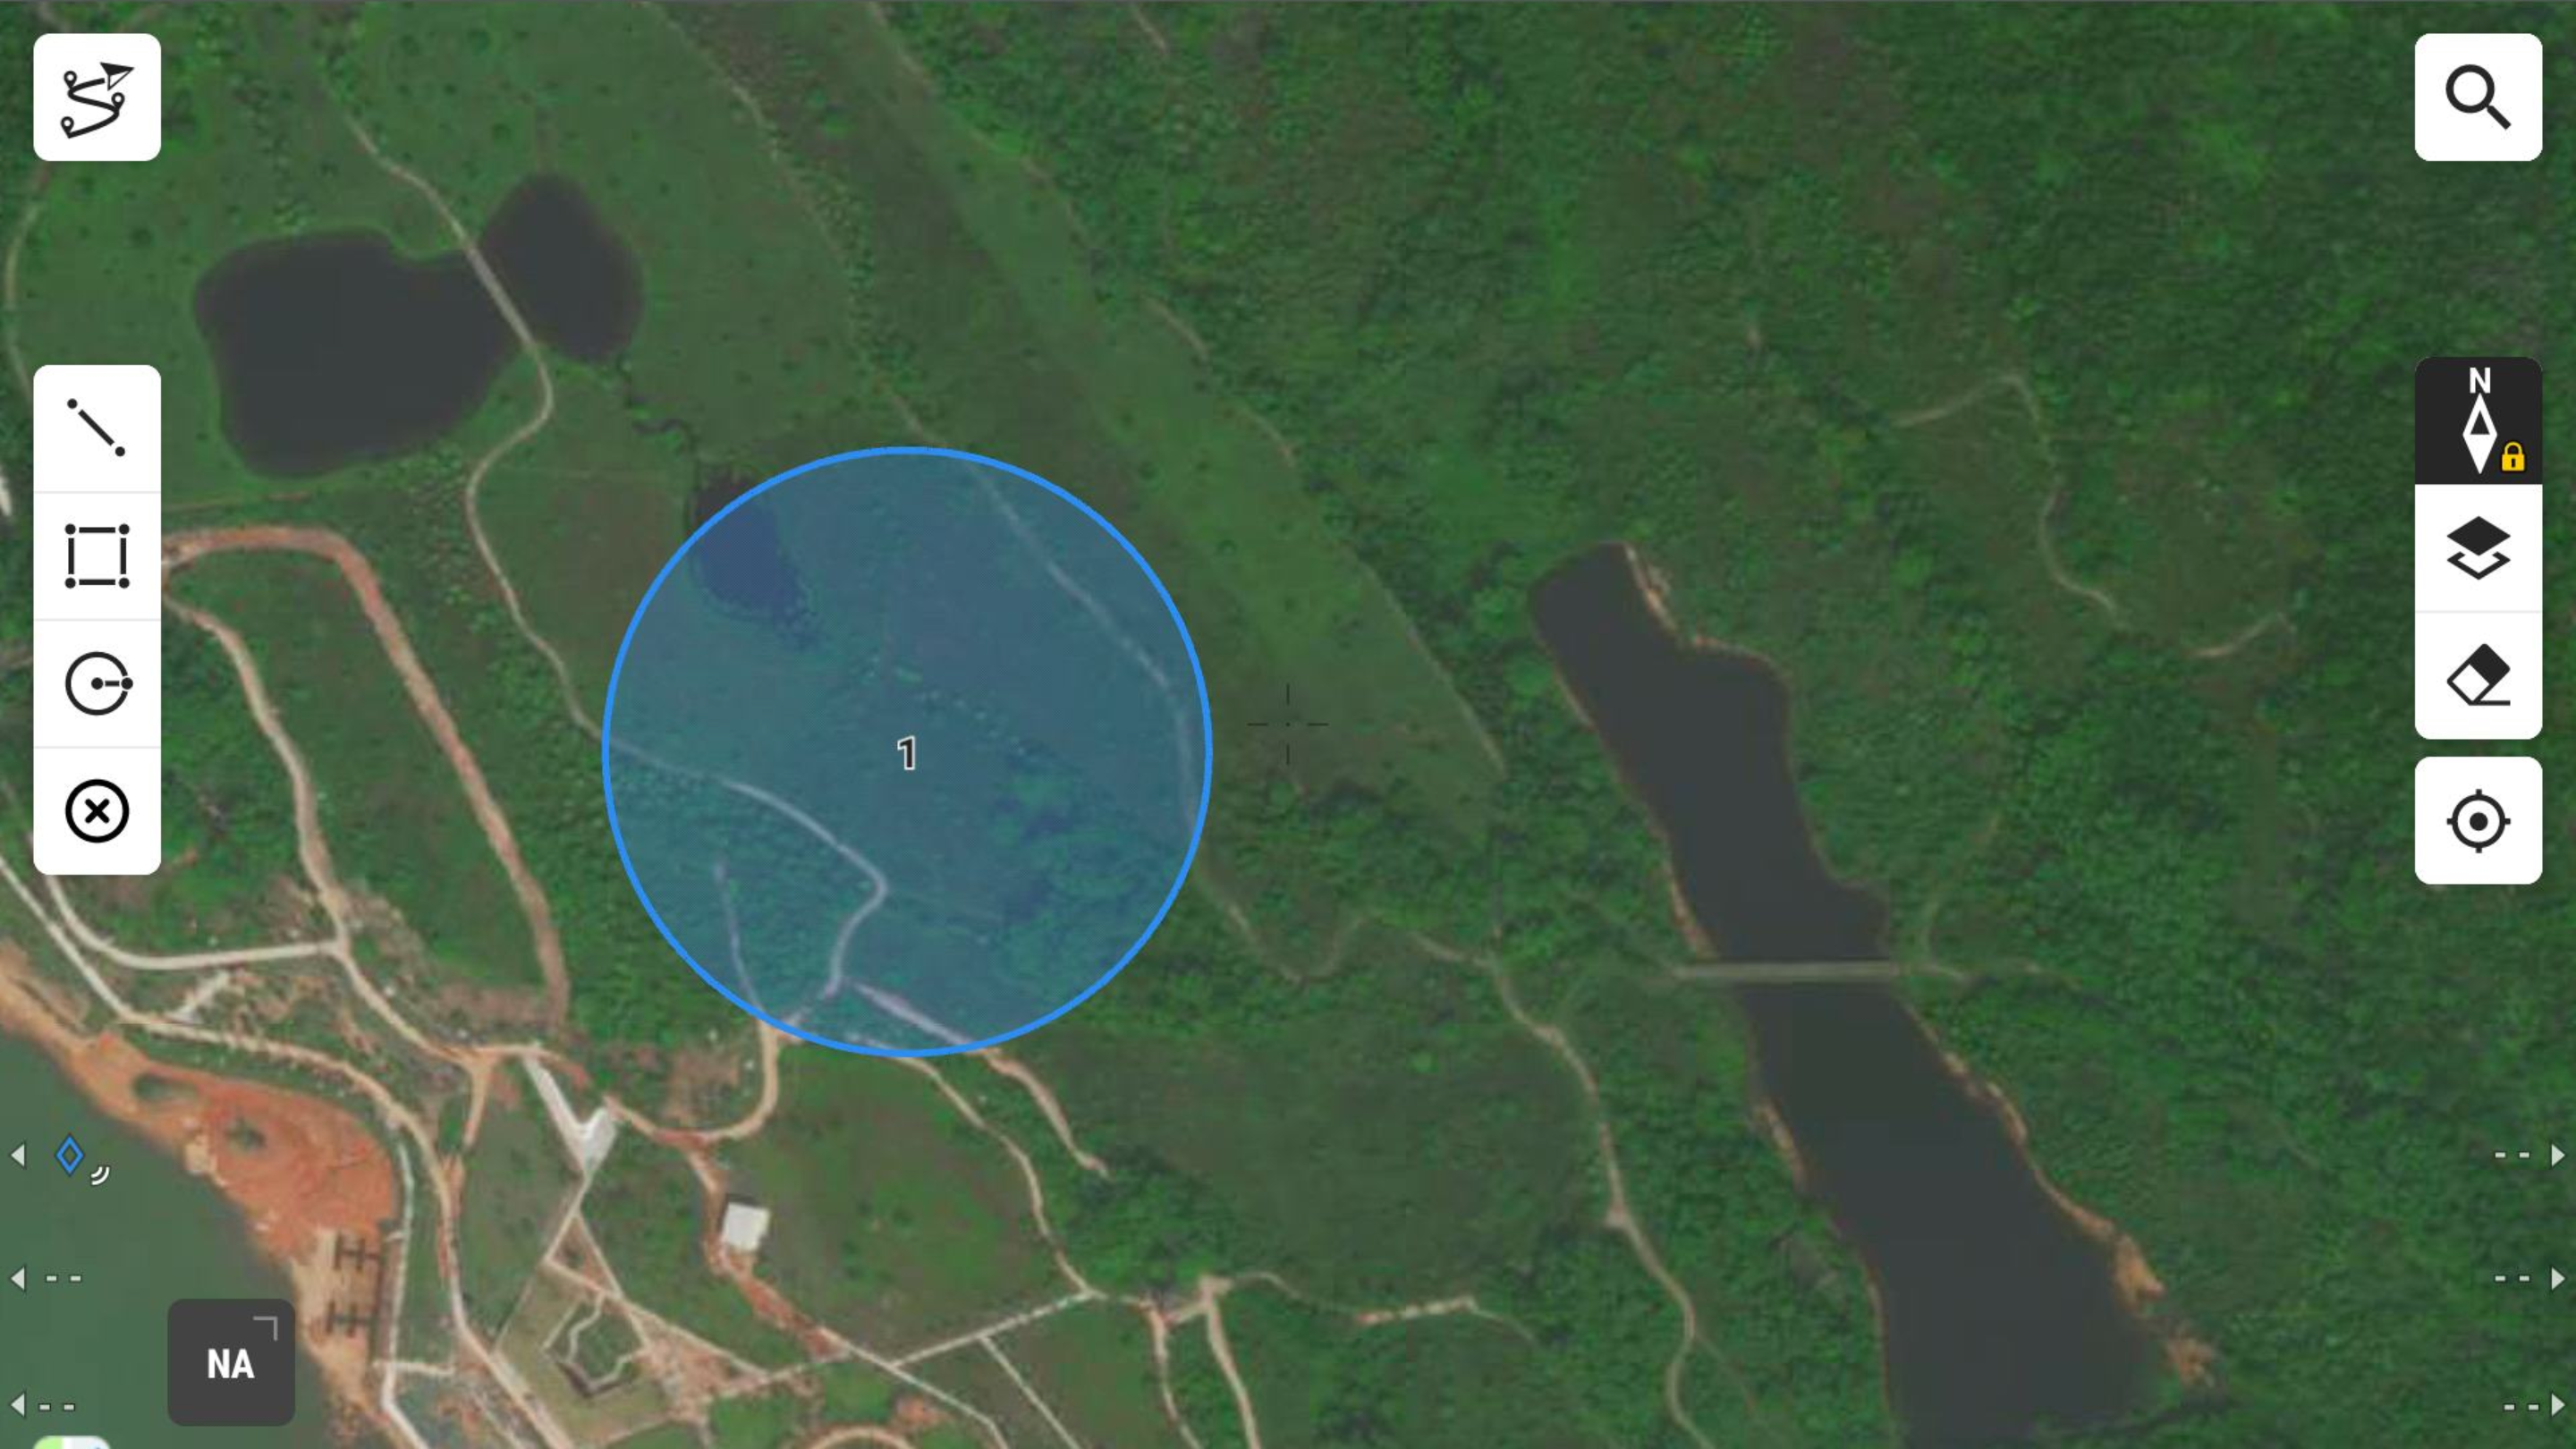
DJI Pilot 2 users can also open the map interface and use the tools on the left to draw points, lines, polygons, and circles on the map. These annotations are synchronized in real time to the "Shared Folder" in the web interface. Annotation distribution is enabled by default for the "Shared Folder" and cannot be disabled.
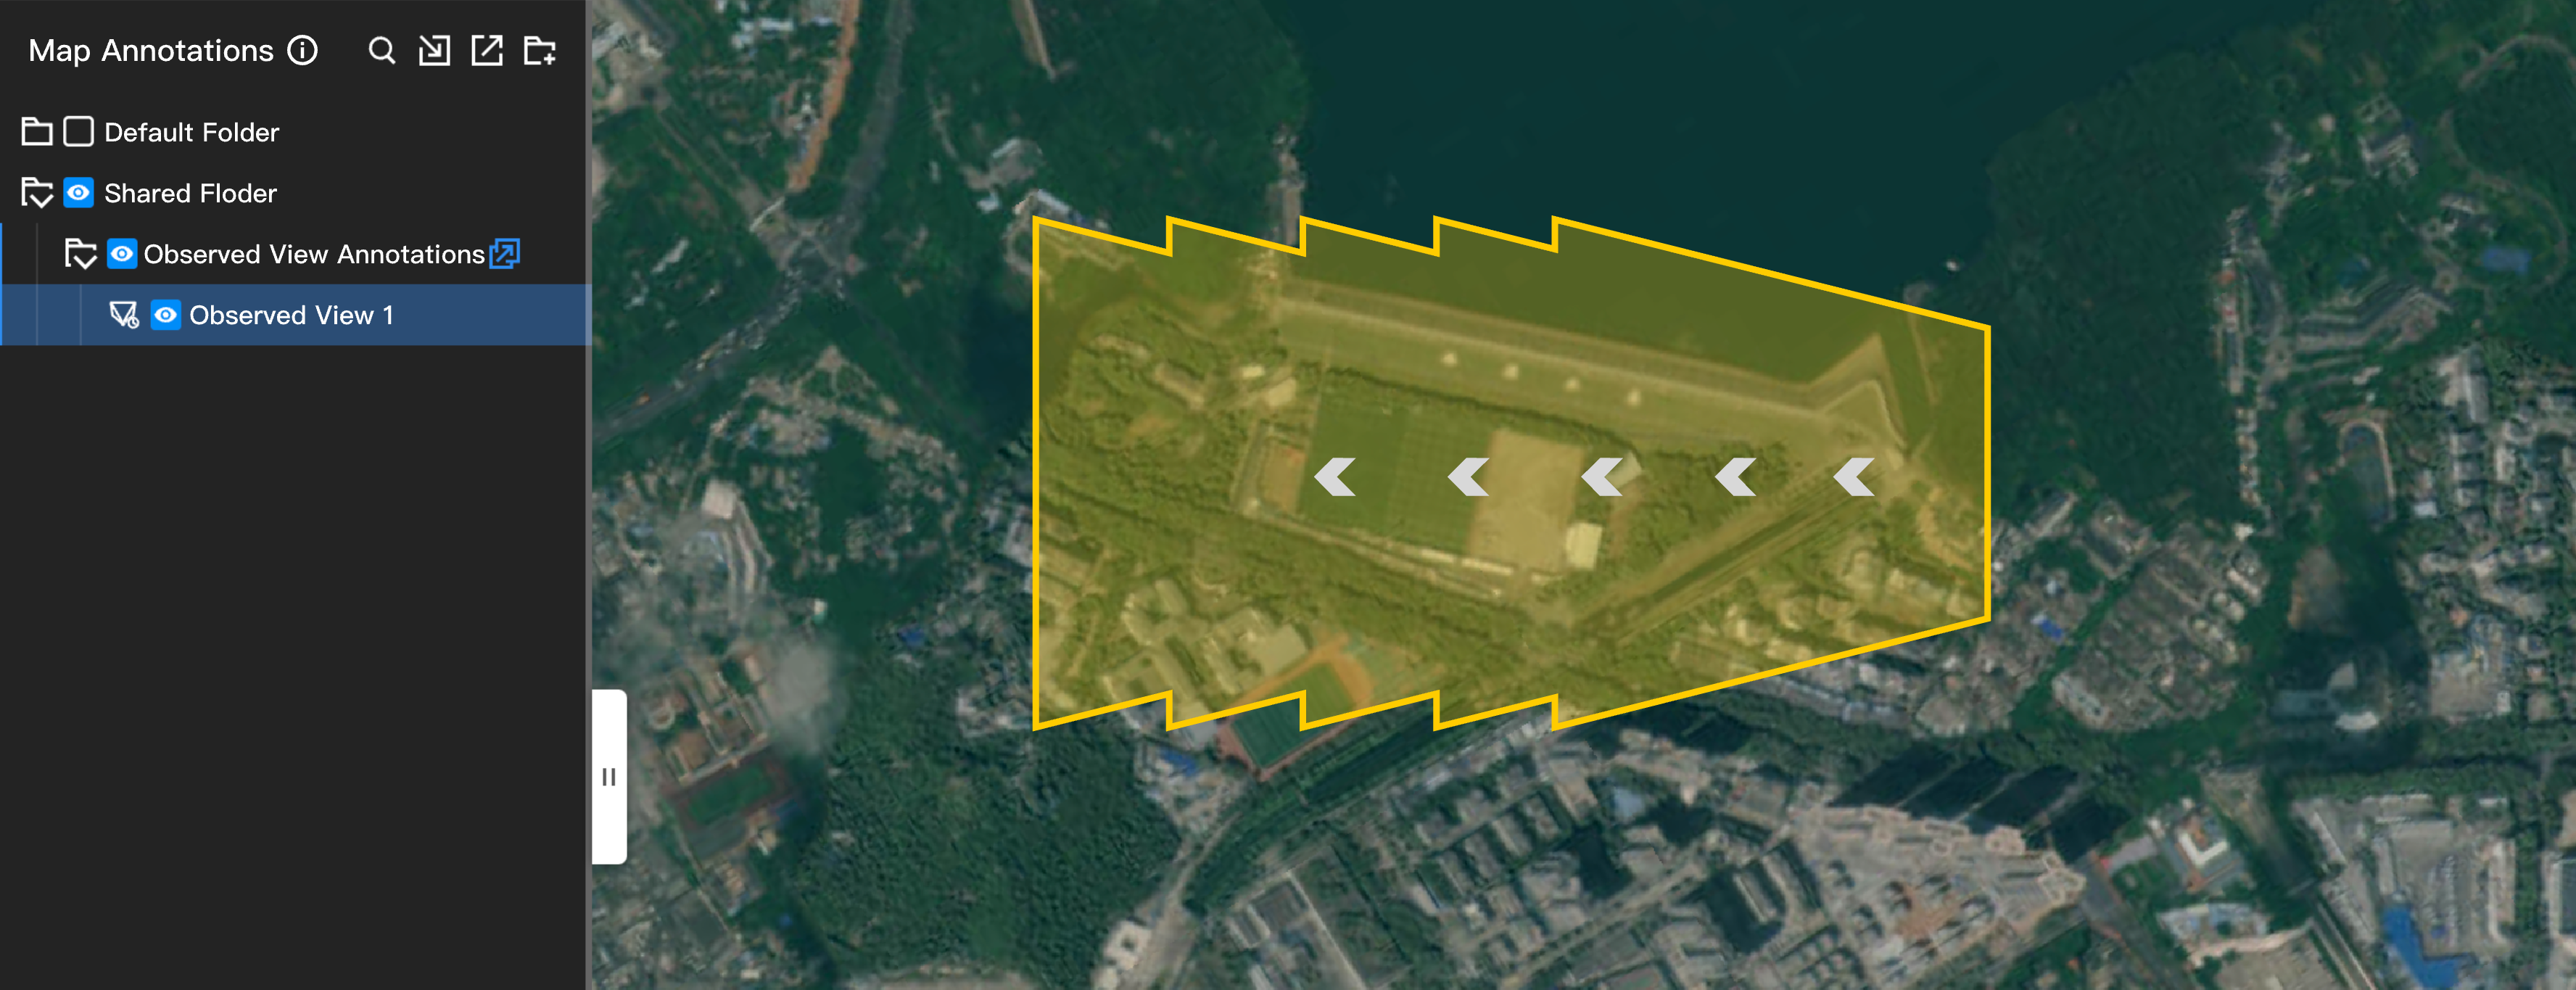
DJI Pilot 2 can record the area observed by the aircraft camera. The resulting observation records are synchronized to the "Observed View Annotations" folder in the DJI FlightHub 2 web interface. You can select an observation record and convert it to a polygon annotation. This feature currently supports only Matrice 4 enterprise series aircraft.
DJI Pilot 2 can use a laser to draw spatial points, lines, and polygons. The resulting spatial annotations are synchronized to the "Shared Folder" in the DJI FlightHub 2 web interface. You can select spatial points and lines and project them onto the ground to create new annotations. This feature currently supports only Matrice 4 enterprise series aircraft.