
Defect Management
The analyzer supports drawing defect boxes directly on media files. Using the camera parameters and the model, the system performs a ray intersection to precisely map the 2D annotation onto the corresponding 3D position on the sandbox model. Conversely, click any point on the sandbox model to automatically recommend related media files that may have captured that point — enabling two-way spatial linkage between 2D media and the 3D model.
Create a Defect
Entry Points
When viewing a media file in the analyzer, open the media detail page and click the defect tool  in the toolbar to enter drawing mode. The following viewing paths all support defect creation:
- Media timeline view
- Media side-by-side comparison
- Map photo single-image view
Draw a Defect
After entering the defect tool, press and hold the left mouse button on the photo and drag to draw a defect box; release to finish. Press [Shift] + left mouse button to pan the photo, and press [Esc] to exit the defect tool.
Defect Properties
After the defect is drawn, the property panel on the right expands automatically:
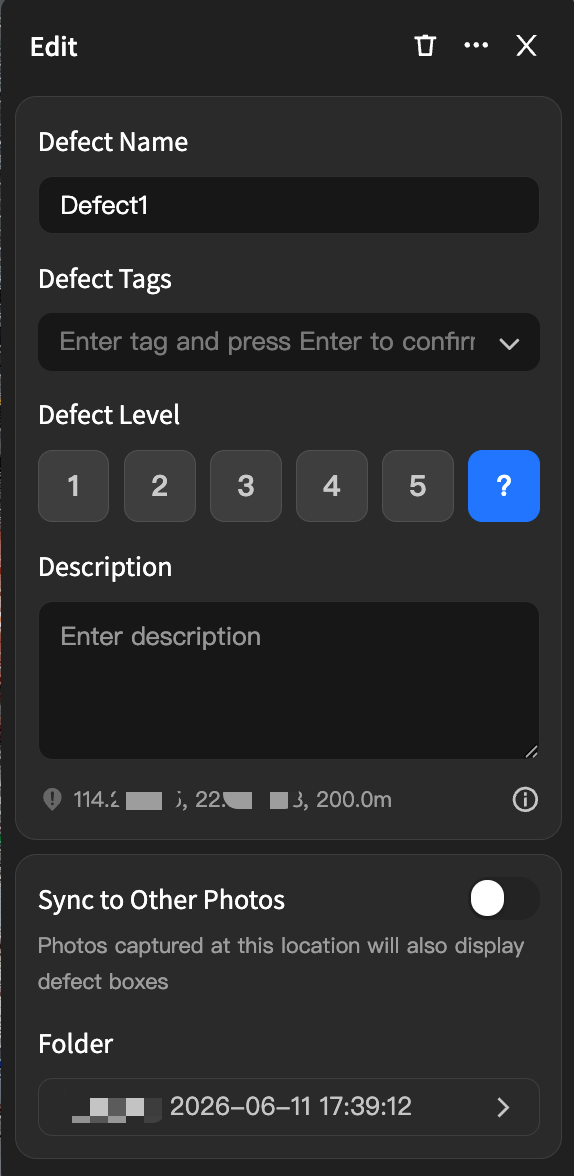
| Property | Description |
|---|---|
| Defect name | Defaults to "Defect N" (incremental); editable. |
| Defect tags | Enter a tag and press Enter to confirm. The dropdown shows up to 10 frequently used tags from this analyzer. Multiple tags per defect are supported. |
| Defect level | Defaults to "?" (unrated). Five levels (1 – 5) are available. |
| Description | Free text input. |
| Location | The longitude, latitude and altitude where the box center ray intersects the current model — computed automatically. |
| Sync to other photos | Off by default. When on, the defect is also displayed (as a dashed box) on other photos taken from the same waypoint. |
| Folder | Defaults to the photo capture date; editable. |
- A defect is essentially a ray based on the photo's pose information (fov). Whichever model is currently displayed on the map is the model used for ray intersection — what you see is what is calculated. When you switch the model on the sandbox, the defect position is recalculated and re-rendered automatically.
- If other photos at the same waypoint were captured with different camera actions (e.g. infrared and zoom), they are not included in the sync for now.
Defect Management List
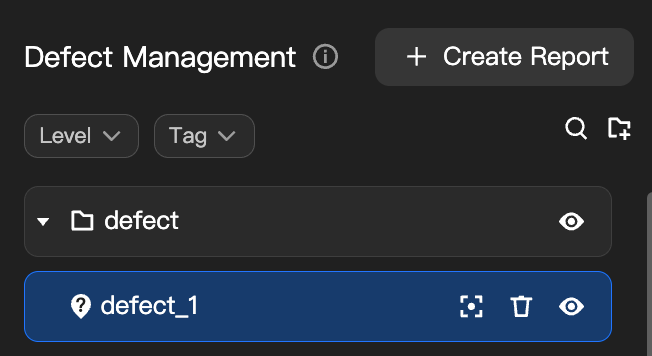
In the analyzer's left navigation, click the Defect Management icon  to open the defect management list.
Folder Organization
- Defects can be organized in folders. Only a single folder level is supported for now.
- By default, defects collected from the same flight route are grouped into the same folder.
- You can create folders and drag defects / folders to reorder them or change their parent.
- Double-click a folder to rename it.
Filtering and Selection
- The icon on each list row directly reflects the defect level; the same level icon is used on the sandbox map points.
- The top of the list supports filtering by level and tag, both with multi-select.
- List and map stay in sync:
- Clicking a defect point on the map scrolls the list to the matching row.
- Clicking a defect in the list highlights its point on the map, but the map view does not auto-center. Click the Center button to center manually.
Edit and Delete
- Hovering over a defect or folder reveals the Show / Hide, Center, and Delete buttons at the end of the row.
- Deleting a folder shows a confirmation pop-up: "All defects inside this folder will also be deleted."
- All defect properties (name, tags, level, description, etc.) can be edited in the detail panel on the right.
Photo Recommendation from Model
Click any point on the sandbox model, and the system will use camera-pose-based geometric back-calculation to automatically recommend photos that may have captured that point — useful for multi-view diagnosis.
Tool Entry Points
The following three entry points all support photo recommendation from the model:
- Click Recommended Photos at the bottom of the sandbox to display recommendations for the current view.
- Right-click anywhere on the sandbox model and choose View Matching Photos.
- Select a defect in the defect management panel; the Recommended Photos section below will automatically list recommended thumbnails.

- The model-to-photo recommendation capability depends on model reconstruction and the pose information of the media files.
- Recommendation scope: media within the analyzer (including panoramas). Results are ordered by capture distance (nearest first).
Defect Report
Entry Points
The following two entry points both support creating a defect report:
- In the analyzer, click the Analysis Report icon to open the analysis report feature, click New Report, and choose Defect Report.
- In the upper-right corner of the defect management list, click New Report to enter the defect report creation flow directly.
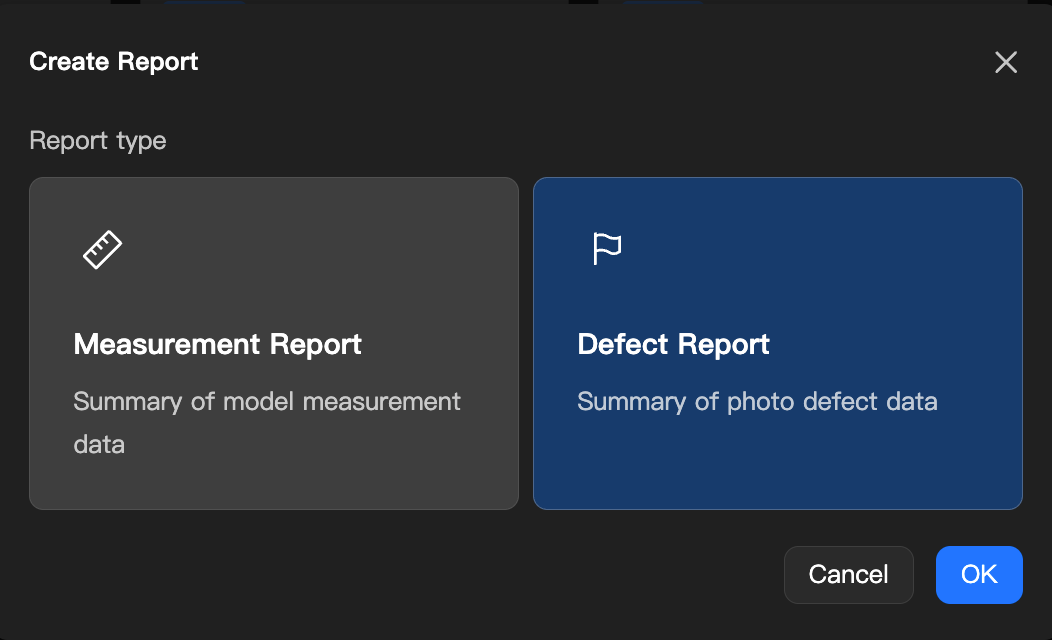
- Defect reports currently support manual creation only. Automated tasks and report templates will be supported soon.
- You can filter by type using the **Report Type** filter in the analysis report and report template lists.
Defect Report Content
A generated defect report contains the following sections:
- Cover: report name, cover screenshot (with defect points), model capture time, report generation time, company logo.
- Defect Overview: total defect count; breakdown by level (1 – 5, unrated); breakdown by tag.
- Defect Details: sorted by defect level from high to low. Each defect includes its original photo (with the defect box), photo name, capture time, defect level, defect tags, defect longitude/latitude/altitude, and the model name and capture time.
- Defect details are sorted by defect level from high to low, so inspectors can prioritize high-level defects.
- Other operations for defect reports (filtering, downloading, email sharing, etc.) are identical to the Analysis Report.